Raster Maps (Online / Offline)
Overview
Raster maps are significant and useful additions to OsmAnd vector maps. They allow you to combine various map sources with vector maps. For example, information about hills and slopes is displayed as a raster layer. You can display an overlay of hiking trails, rain maps, real-time traffic data, and an overlay of satellite imagery on a translucent base vector map. You can also switch the default map source from offline vector maps to online raster tiles.
Raster maps in OsmAnd are typically delivered as a set of small images (tiles) arranged in a grid. Unlike vector maps, which store objects such as roads, points, and polygons as data, raster tiles are pre-rendered images and can appear pixelated at high zoom levels because each pixel has a fixed value.
Advantages:
- Since raster maps are pre-rendered, they load faster, eliminating the need for the device to process and render data in real-time.
- Raster maps can be loaded dynamically while browsing.
- You can create an offline cache and download only missing tiles as needed.
- You can use an unlimited number of external web sources for raster maps, making it flexible for different map types, like satellite views or specialized maps.
- Raster data, such as traffic information, can be updated regularly after expiration (e.g., every 20-30 minutes, depending on the configuration).
Disadvantages:
- Raster maps take up significantly more space than vector maps. For example, a city map might be 15 MB as a vector map, but increase to 50 MB at zoom level 15, 200 MB at zoom level 16, and up to 800 MB at zoom level 17.
- You cannot tap specific places or objects on raster maps to get more information.
- Raster maps cannot be styled or modified to exclude specific objects.
- Zooming in too far can cause the image to appear pixelated, especially if high-resolution tiles are unavailable.
- It’s not possible to rotate the map without rotating the text, which can make reading labels difficult.
Use Cases
Raster maps have a wide range of uses. Here are some of the most popular:
- Satellite images as an underlay.
- Real-time traffic information.
- Rain forecast as an overlay.
- Topographic maps with the shading of hills and slopes.
- Active cycling and running routes as an overlay.
- Real-time vessel information.
- Online OpenStreetMap tiles for OSM editing.
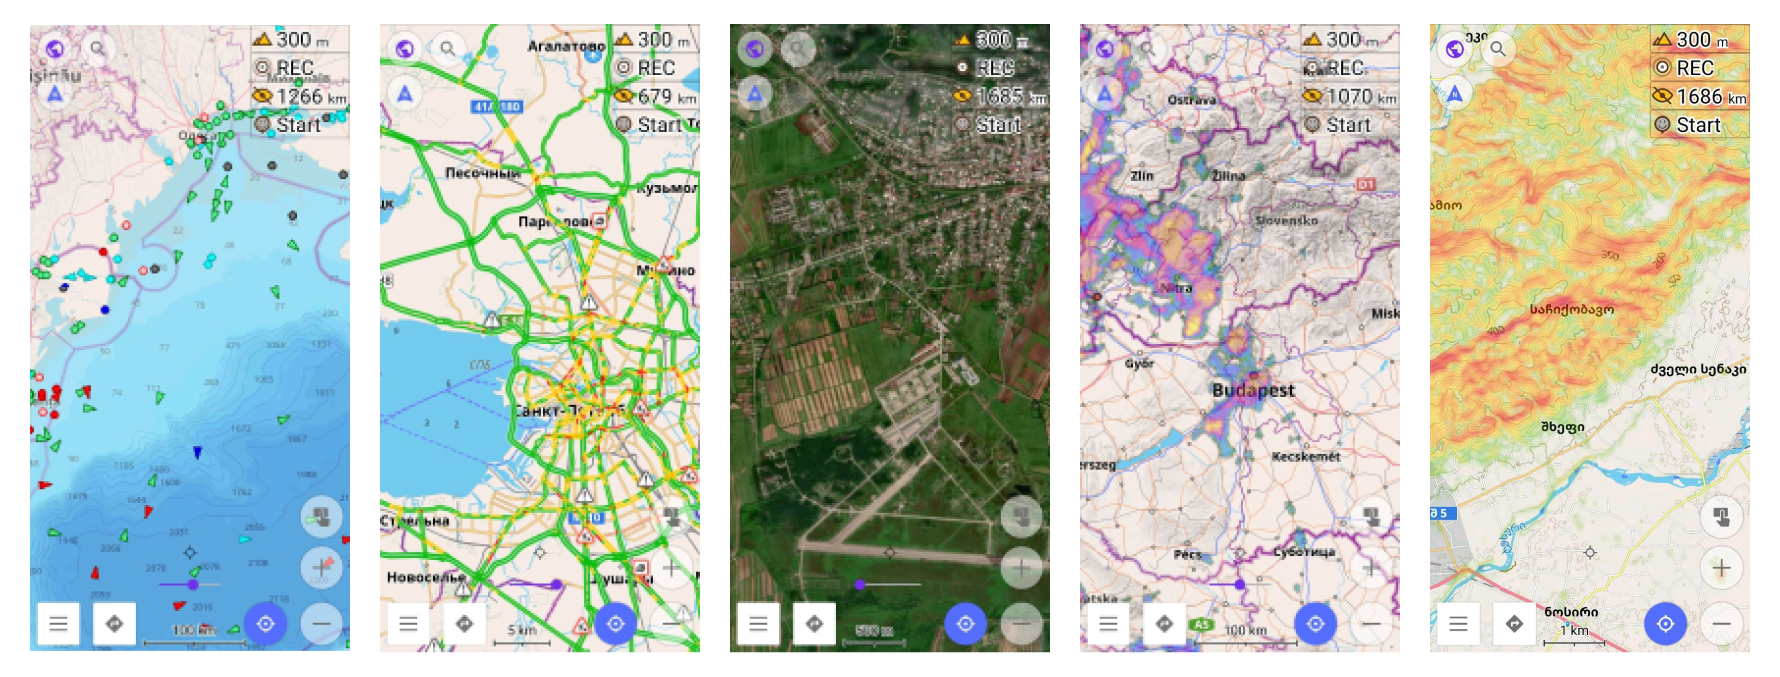
You can also change the main source of maps from vector maps to online tiles.
Getting Started
Enable plugin.
- iOS. For iOS, this feature works by default.
- Android. For Android, to use raster maps in OsmAnd you need to enable Online maps plugin. Follow these steps: Menu → Plugins → Online maps → ⋮ → Enable
Change layer parameters. To improve the visibility and mix of raster map layers, you can adjust the layer transparency using the screen slider. Additionally, you can modify the vector map style by hiding polygons, making the underlay layers more visible. This is especially useful when viewing satellite imagery.
Layers
- Android
- iOS
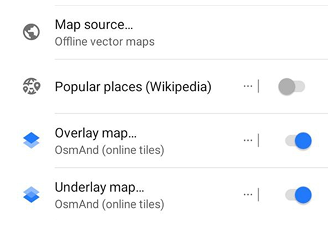
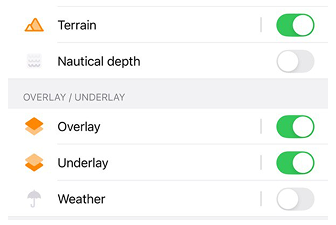
In OsmAnd, raster maps can serve as an additional map source alongside the default vector maps, which are optimized for offline use.
You have the flexibility to add one or two online tile layers to complement your base map. This allows you to view up to three map layers simultaneously on your screen (plus Terrain). Think of them like a pie: Underlay (raster base below), Main (vector or raster core), Overlay (raster atop), with Terrain shading over all. For instance, you can use satellite imagery as the Underlay, OsmAnd's offline vector map as the Main layer with increased transparency, and a bike path map as the Overlay on top.
Vector maps are available only in the Main layer (and are the default there). Raster maps can be used in all three layers: Main, Underlay, and Overlay.
If you want to switch these layers faster (Main map source, Overlay, Underlay, and Terrain), you can add a Quick Action (Custom button) to the map screen and assign the corresponding map actions to it.
You can also adjust the transparency of the base map to blend it with your layers. If needed, you can enable a transparency slider on the main screen for quick adjustments.
Main
- Android
- iOS
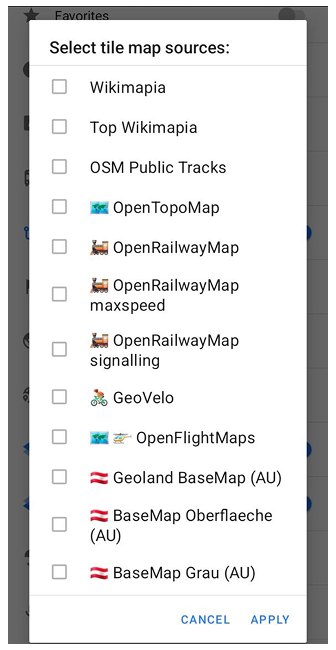
Go to: Menu → Configure map → Map source… → Add more…
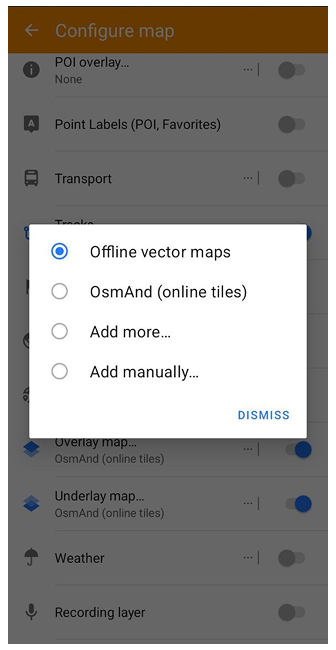
Go to: Menu → Configure map → Map type → Online maps → Install more...
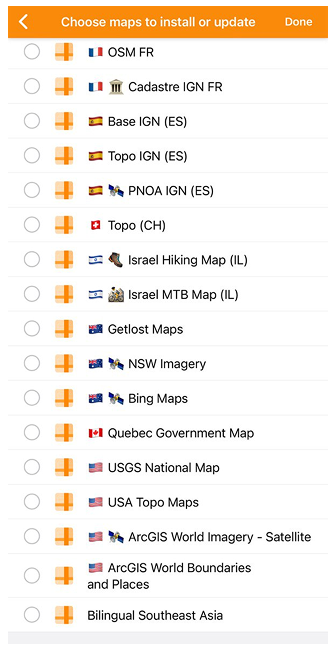
By default, the main map is set to Offline vector maps (OsmAnd maps), optimized for offline use. You can choose a different map source from the list (Add more (Android) or Install more (iOS)) or add your own.
Overlay
- Android
- iOS
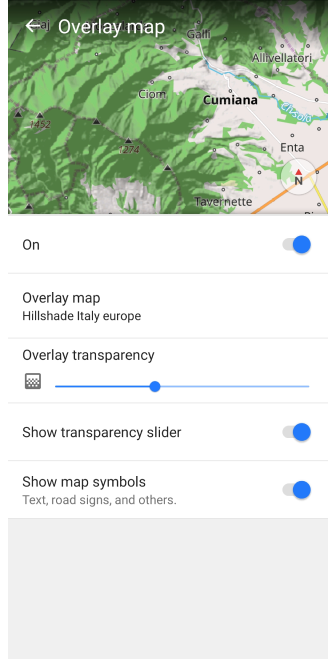
Go to: Menu → Configure map → Overlay map…
Go to: Menu → Configure map → Overlay / Underlay → Overlay
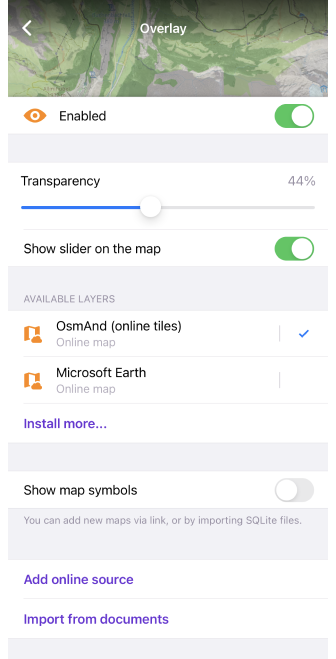
- Switch on/off the Overlay map layer.
- Overlay transparency (Android)/ Transparency of the Overlay map (iOS).
- Show transparency slider (Android) / Show slider on the map (iOS). Quick access to the transparency setting.
- Overlay map source (Android) / Available layers (iOS). Select an online tile map from the list to add it directly as your Overlay layer.
- Show map symbols - such as text, road signs, and others.
- Add online source (iOS). Add new online source.
- Import from documents (iOS).
Underlay
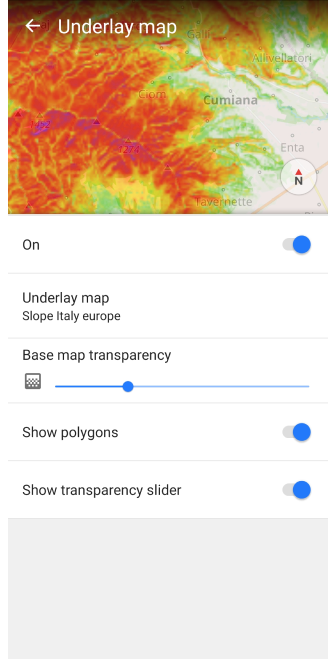
- Android
- iOS
Go to: Menu → Configure map → Underlay map…
Go to: Menu → Configure map → Overlay / Underlay → Underlay
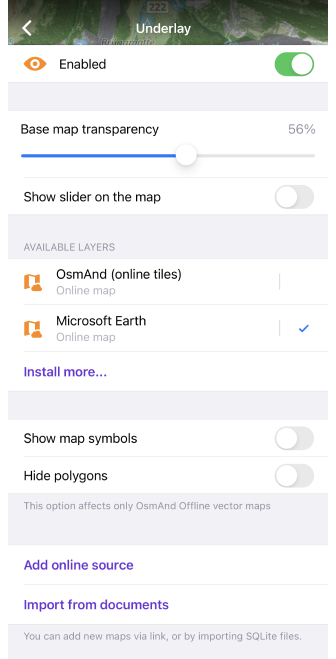
- Switch on/off the Underlay map.
- Base map transparency.
- Show transparency slider (Android) / Show slider on the map (iOS). Quick access to the transparency setting.
- Underlay map source (Android) / Available layers (iOS). Select an online tile map from the list to add it directly as your Underlay layer.
- Show/Hide polygons.
- Add online source (iOS). Add new online source.
- Import from documents (iOS).
Terrain
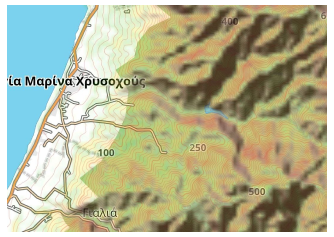
In the context of raster maps, Terrain refers to a relief shading layer that helps visualize the shape of the landscape on a flat map. This layer is based on raster terrain data and is displayed on top of the base map to improve perception of slopes, and terrain forms.
Terrain shading is one of the raster layers available in OsmAnd and represents a colorized relief visualization derived from elevation data.
To use the Terrain layer you need to:
- Purchase the Topography plugin:
- Enable the Topography plugin:
Menu → Plugins → ︙ → Enable - Select your required region, and download Hillshades or Slopes (for Maps+) or Terrain map 3D (for Pro).
- The download process may take some time, depending on the size of the selected region and the speed of your Internet connection.
Terrain visualization can be combined with other raster layers and with the default vector map.
More advanced terrain features, including 3D relief (only Pro) and additional terrain-related options, are described in the Topography article.
Prepare/Copy Maps
There are multiple ways how to add a new raster map, copy it from another device, prepare it on a PC, and pre-download tiles to be used offline. For example, you can create your map package on a PC using special software such as MOBAC, OsmAndMapCreator, etc. Typically raster maps are distributed as files with .sqlitedb extension.
Here are the main methods for adding a new raster map source which is not defined in OsmAnd yet:
- Open ready to use
.sqlitedbfile with OsmAnd. - Import package with prepared online maps from another OsmAnd application as a special
.osfpackage via Import / export functionality. - Create a new online map source on a mobile device itself.
- Prepare a magic URL with online map source parameters and open it with OsmAnd.
Add New Online Source
- Android
- iOS
Go to: Menu → Configure map → Map source… → Add manually…
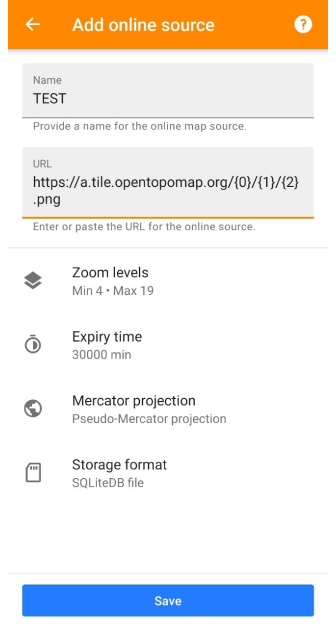
Go to: Menu → Configure map → Overlay / Underlay → Add online source
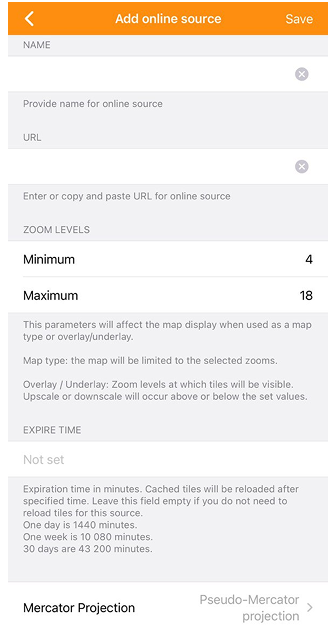
To create a raster map source you need to know the URL of a tile, which is a specific URL that distributes map tiles in the Mercator Projection. For example, a tile URL might look like this: https://tile.osmand.net/hd/6/55/25.png, where tile.osmand.net/hd/ is the base URL.
Here are the key parameters to configure when setting up a new online map source:
| Parameter | Description |
|---|---|
| Name | Provide a name for the new online map source. |
| URL | Enter or paste the URL for the online tile source. Make sure it follows the tile URL format. The URL can contain certain placeholders, which OsmAnd will automatically replace based on the specific tile needed. The most commonly used placeholders are based on the OpenStreetMap slippy map tilenames convention:
|
| Zoom levels | This parameter affects how the map is displayed.
|
| Expire time | Set the duration (in minutes) after which cached tiles will refresh. You can leave this field blank if you don’t want tiles to reload automatically.
|
| Mercator Projection | Choose between Pseudo-Mercator projection and Elliptic Mercator projection, depending on the source. |
| Source format / Storage format | Select how tiles should be stored: either in an SQLiteDB file or as one image file per tile. |
Magic URL to Install Map Source
Online maps can be added with a special link to the OsmAnd Raster map list. Click on this link and choose OsmAnd for opening:
http://osmand.net/add-tile-source?name=TEST&min_zoom=9&max_zoom=15&url_template=https://a.tile.opentopomap.org/{0}/{1}/{2}.png
| Parameter of link | Example |
|---|---|
| [Constant part] | http://osmand.net/add-tile-source |
| [Separators] | ? & |
| [Name] | name=TEST |
| [URL] | url_template=https://a.tile.opentopomap.org/{0}/{1}/{2}.png |
| [Zoom levels] | min_zoom=9 / max_zoom=15 |
You find an added Online map in the list of the Main / Underlay / Overlay layer menu.
Manage Map Data
Raster maps can take up a significant amount of disk space, so you might need to regularly check it. For large datasets, it's recommended to use SQLite raster source because it will store all tiles in 1 large file (SQLite database).
To change tile format, you can choose Storage format in the edit menu of online maps:
- Android: Menu → Maps & Resources → Local → Map sources → choose online maps →
⋮ → Edit → Storage format → SQLiteDB file / One image file per tile - iOS: Menu → Maps & Resources → Local → Online raster maps → i → Edit → Source format → SQLiteDB file / One image file per tile
Clear Tile Cache
- Android
- iOS
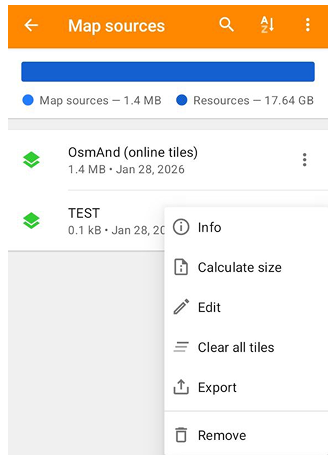
Go to: Menu → Maps & Resources → Local → Map sources → choose online maps →
⋮ → Clear all tiles
Go to: Menu → Maps & Resources → Local → Online raster maps → i → Clear cache
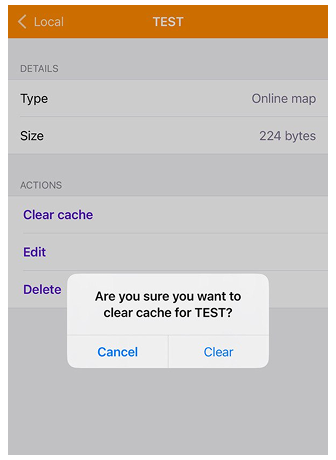
Tiles are stored in the cache when using Online raster maps as a Main / Overlay / Underlay layer. You can see the size of your SQLite file under your Online map name in the list. Sometimes regular cleansing is required to speed up the display of the tiles or to update the data.
Download / Update Tiles
If you want to access raster maps offline, you may need to preload tiles. This can be done on your mobile device, but be aware that some services may block large packet downloads. You can also use the same feature to update already downloaded tiles for selected areas, otherwise, OsmAnd will continue to display tiles that are already stored in the cache.
For the maps to automatically update the tiles after a while, you can set an Expiry time, then OsmAnd will reload the tiles as soon as they are displayed.
- Android
- iOS
 |  |  |  |
-
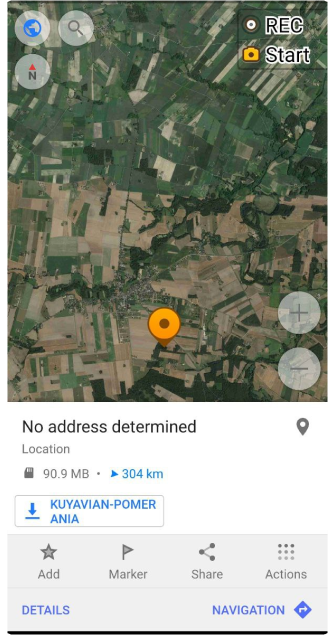
To download or update raster tiles, you need to select the source of the online map as the Main map source (Android / iOS). You can also select online tiles separately for the Overlay map or for the Underlay (Only for Android).
-
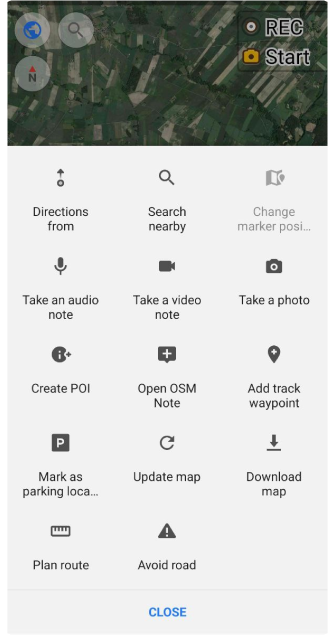
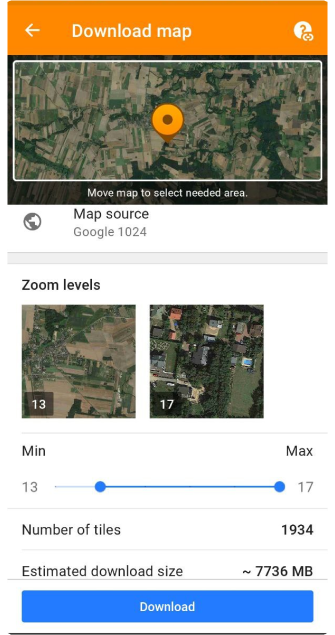
For the Android version of the OsmAnd app, you need to select an area according to the screen size of your device and make a long tap the map. Then select Actions in the map context menu and the Download map or Update map option. On the Download Map screen, make changes to the necessary settings and tap Download.
-
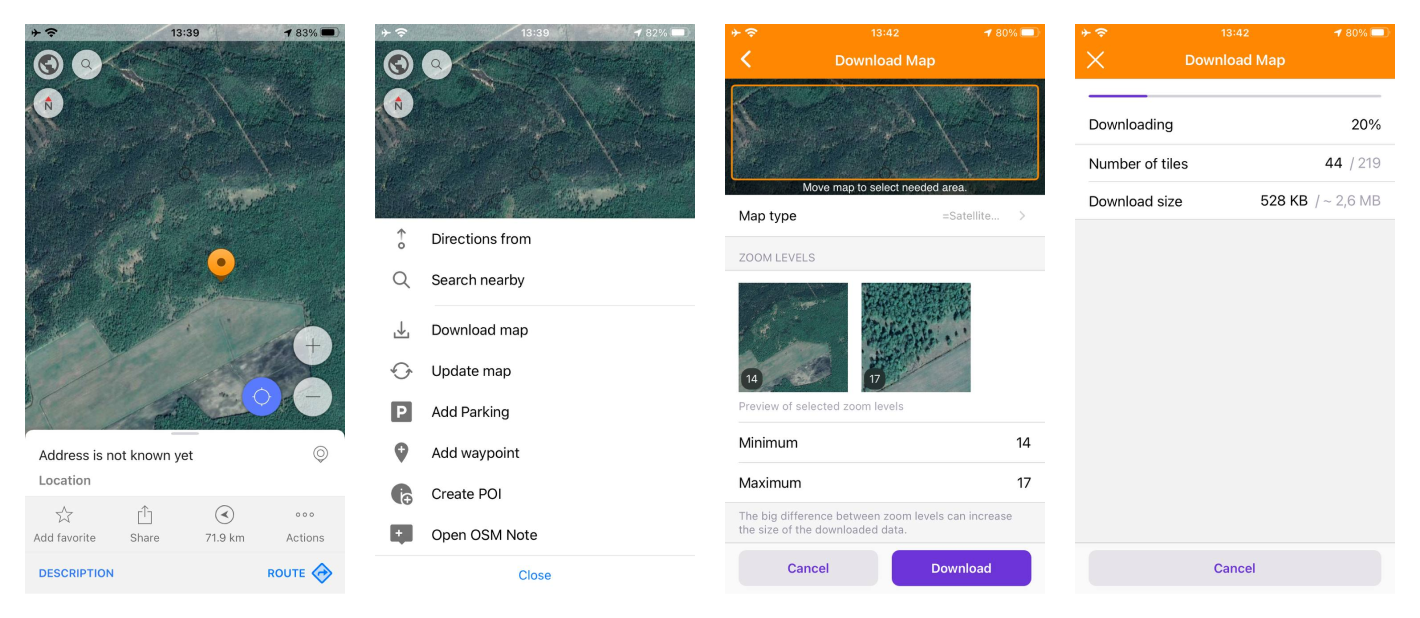
In the iOS version of the OsmAnd app, you need to long tap the map, then select Actions and the Download map or Update map option from the map context menu. On the Download Map screen, you can select the required area and modify the necessary settings. After you set all the parameters, you can see the number of tiles and the download size.
Change Parameters
- Android
- iOS
Go to: Menu → Maps & Resources → Local → Map sources → choose online maps → ⋮ → Edit
Go to: Menu → Maps & Resources → Local → Online raster maps → i → Edit
Raster maps can be used as they already exist if the tiles are already mapped. If the raster maps are provided online, there is always a base URL that needs to be configured. There are a few more basic parameters that can be changed for raster maps, you can read about that in this section of the article. More complex parameters are encoded in the internal components of the SQLite format.