Configure Screen
Overview
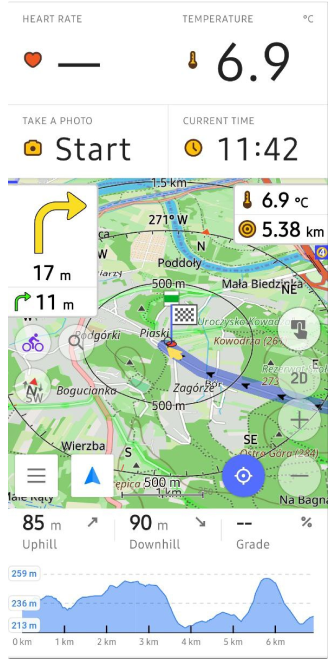
The Configure screen menu in OsmAnd allows you to customize the map interface by adding and arranging widgets, buttons, and quick actions across multiple panels.
You can:
- Add informational, navigational, and marker-related widgets.
- Add or edit Quick Actions, Custom buttons and Default buttons.
- Organize widgets in panels (top, bottom, left, right, center).
- Create multiple pages within side panels, choose size of widgets.
- Choose row height and toggle widget icons.
All widgets are profile-dependent — each profile has its own layout, order, visibility, and settings.
- Android
- iOS
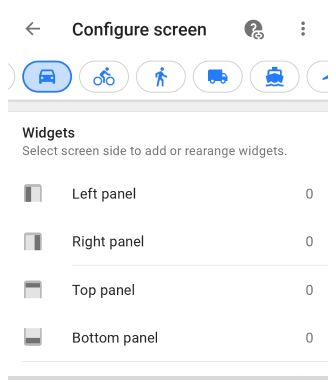
Go to: Menu → Configure screen
Go to: Menu → Configure screen
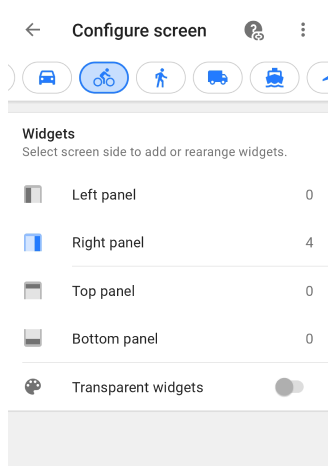
Widget Panels
- Android
- iOS
Go to: Menu → Configure screen → Widgets
Go to: Menu → Configure screen → Widgets
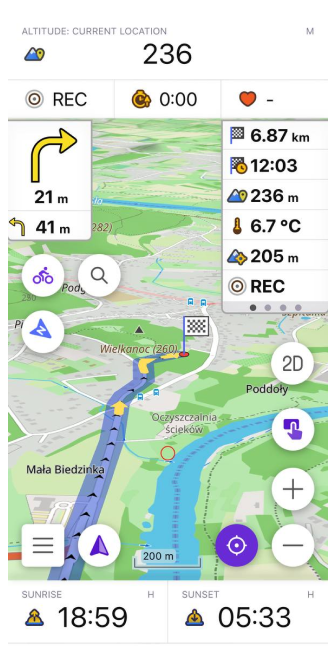
OsmAnd allows you to organize the map interface using customizable widget panels.
You can add, reorder, group, and remove widgets in the following panels:
- Top panel
- Bottom panel
- Left panel
- Right panel
Each panel supports different layout behaviors:
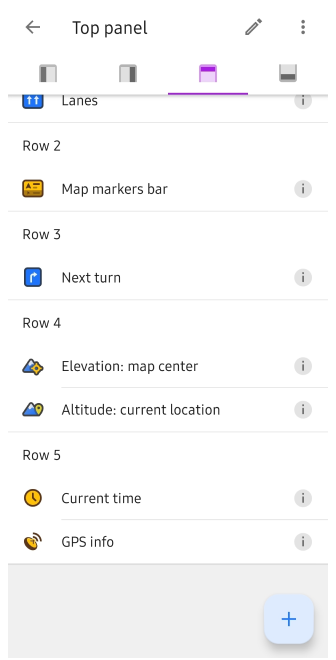
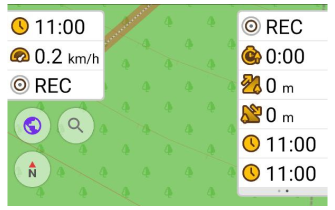
- Top and Bottom panels display widgets in rows. You can place one or two widgets per row and add multiple rows if needed.
- Left and Right panels support multiple pages. You can group widgets into separate pages and switch between them.
Widgets Catalog
- Android
- iOS
Navigational widgets:
-
Bearing.
This set shows the absolute or relative bearing to a target in angular units.
3 widgets are included: Relative bearing, Magnetic bearing, True bearing. -
Elevation profile (Top/Bottom only, Android only).
Displays route elevation and slope. -
Lanes (Top/Bottom only).
Visual lane guidance. -
Map markers bar (Top/Bottom only).
Shows distance/direction to saved markers.
Configurable for 1 or 2 markers. -
Navigation point.
The set shows the remaining distance to a destination, intermediate point, arrival time to an intermediate point, or travel time for a calculated route.
4 widgets are included: Distance to destination, Distance to intermediate, Time to intermediate, Time to destination. -
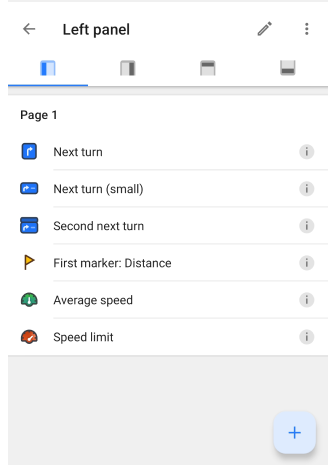
Route maneuvers (Left/Right panel only).
This set is activated during navigation and shows the distance and arrow to the next maneuver.
3 widgets are included: Next turn, Next turn (small), Second next turn. -
Speed limit.
Display the current speed limit for the road. -
Speedometer.
Shows the current speed based on GPS data and limited speed based on OpenStreetMap data. -
Street Name (Top/Bottom only).
Displays the current or upcoming street.
Informational widgets:
-
Altitude.
The set displays the altitude above sea level for the current location or for the current map center.
2 widgets are included: Altitude: current location, Elevation: map center. -
Average speed.
Shows the average speed of the current trip. -
Battery level.
Displays the device battery level. -
Coordinates widgets (Top/Bottom only).
This set displays the geographic coordinates of the current geolocation.
2 widgets are included: Coordinates: map center, Coordinates: current location. -
Current Speed.
Displays speed from the GPS sensor. -
Current time.
Displays the current system time. -
Glide ratio.
The widgets show the glide ratio to the target and the average glide ratio for the current flight.
2 widgets are included: Glide ratio to target, Average glide ratio. -
GPS info (Android only).
Shows the number of detected satellites. -
Map markers.
The set shows the distance or estimated time of arrival (ETA) for the first two markers in the list.
2 widgets are included: First marker, Second marker. -
Radius ruler.
Shows the distance between your location and a point on the map, circled by the Radius ruler tool. -
Sunrise, sunset.
Shows the time of the next sunrise or sunset for the center of the map.
2 widgets are included: Sunrise, Sunset.
Plugin-Based widgets:
-
Audio/video notes.
Quick access to capture media.
4 widgets are included: On request, Record audio, Record video, Take a photo. -
Developer widgets.
Displays optional information.
5 widgets are included: Map rendering FPS, Camera tilt, Camera elevation, Zoom level, Distance from camera to target, Available RAM. -
External Sensors widgets.
The set helps track data from BLE/ANT+ sensors in real time.
6 widgets are included: Heart Rate, Bicycle Power (Android only), Bicycle Cadence, Bicycle Speed, Bicycle Distance, Temperature. -
Mapillary.
Opens the Mapillary app for street-level imagery. -
OsmAnd Tracker status.
Quick access to the OsmAnd Tracker application. -
Parking widget.
Distance from the center of the screen to the saved parking location. -
Trip recording.
Starts and stops track recording, and displays track recording data.
4 widgets are included: Distance, Duration, Uphill, Downhill. -
Whether.
Displays detailed weather information.
5 widgets are included: Temperature, Air Pressure, Wind, Cloud, Precipitation.
- Only available in the Top and Bottom panels and must be placed in separate rows: Coordinates widgets, Elevation Profile widget, Lanes widget, Map markers bar, Street Name widget.
- Only available in the Left and Right panels: Route maneuvers.
Rows
- Android
- iOS
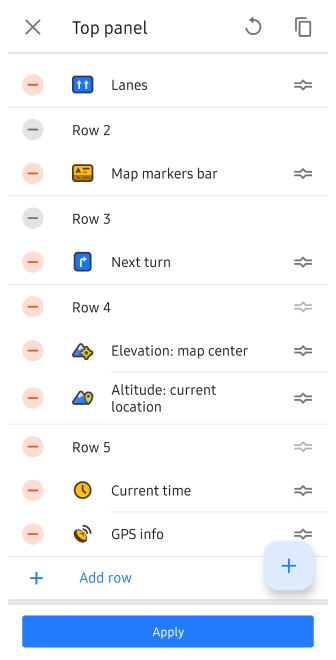
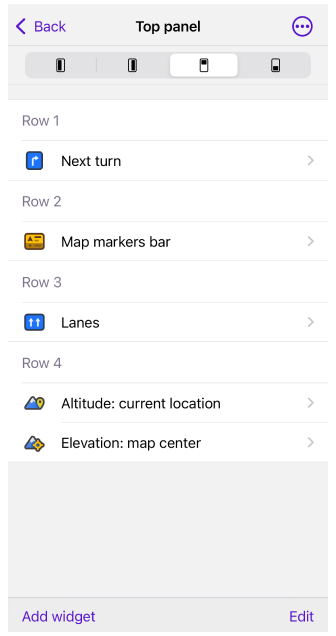
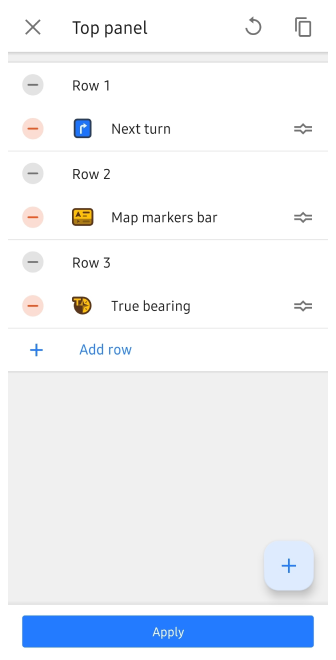
The Row mode feature allows you to add as many rows as needed to the top and bottom panels. You can display multiple widgets per row, enhancing the amount of visible information.
How to configure rows:
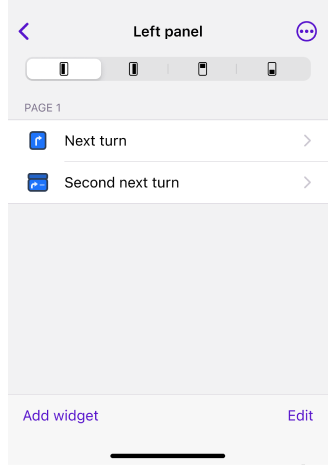
- Add widgets: Tap the Plus button (Android) or Add widget (iOS), then select from the list of available widgets.
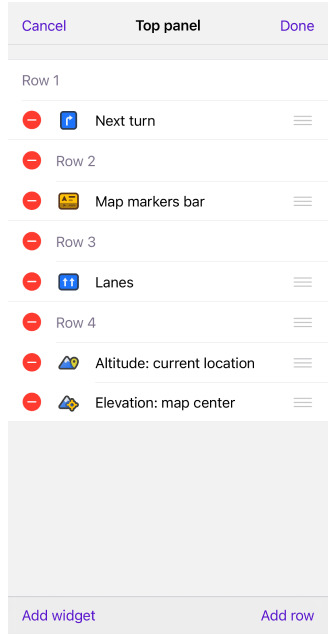
- Reorder widgets: Tap the Pencil button (Android) or Edit (iOS) to rearrange the widgets.
- Add rows: Tap the Add row button to create new rows for your widgets.
- Move widgets: Drag widgets between different rows.
- Access widget settings: Tap the "i" icon (Android) or the ">" arrow (iOS) to open widget settings.
- Save changes: Tap Apply (Android) or Done (iOS) to save the layout.
Widget Types and Restrictions
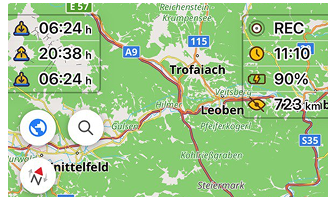
The mode allows you to add more than one widget in a single row on the top and bottom panels to display as much information as needed.
-
Complex widgets. Only one complex widget can be added per row. These include:
-
Simple widgets. Multiple simple widgets can be added to a single row. These widgets could display Name, Units of measurement, Value, and Icon.
- Android
- iOS

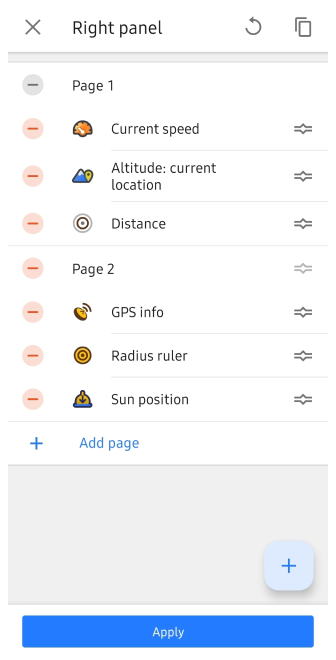
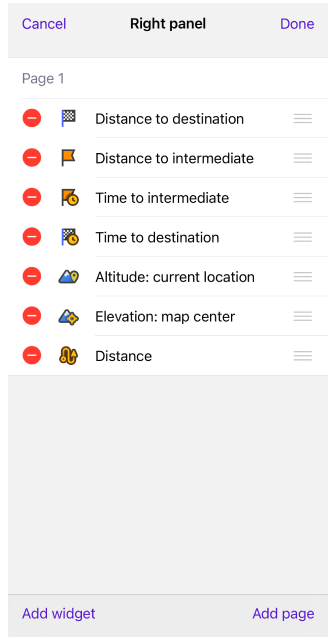
Pages
- Android
- iOS
Go to: Menu → Configure screen → Right panel / Left panel → Edit → Add page
Go to: Menu → Configure screen → Right panel / Left panel → Edit → Add page
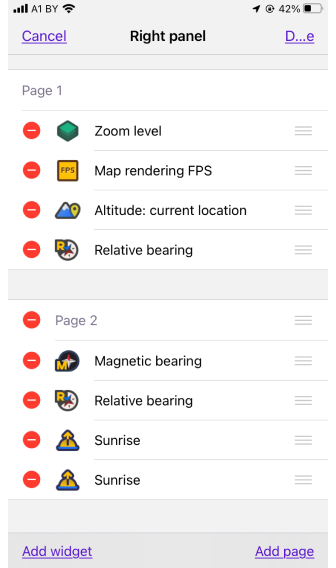
Widgets in the right and left panels can be grouped into Pages. The Pages mode feature allows you to add 5 pages to the left and right panels.
How to configure rows:
- Add a Page. Navigate to the Left/Right Panel settings and tap Edit → Add Page.
- Organize widgets by Page. This feature is helpful when different sets of widgets are needed for different tasks, such as navigating versus browsing the map.
- Pages allow you to create widget sets for specific scenarios, improving workflow and reducing clutter.
Widget Settings


-
Widget size options (for all panels):
You can customize the size of Simple widgets in the Top, Bottom, Left, and Right panels:- Small. Ideal for compact displays, saving more screen space for maps.
- Medium (default widget size). Balances visibility and space usage.
- Large. Provides larger, more visible widget information.
-
Hiding widget icons (for top and bottom panels):
- Improves clarity and maximizes the space for important data.
- Especially useful when displaying many widgets on the same row.
-
Widget text label visibility
- Text label visibility depends on widget size and panel location. In Medium and Large sizes, labels are always displayed.
- In Small size, labels are not shown on the Left and Right panels. On the Top and Bottom panels, the label may be hidden automatically (when positioned on the right side) to keep numeric values fully visible.
- There is no separate option to turn text labels on or off.
-
Individual size for different rows (for all panels):
- Widgets can be individually sized by adjusting the row and column size.
- NOTE: Changing the size of one widget in a row/column will resize all widgets in that row/column.
-
To change the widget size and icon visibility:
- Select a widget that you have already added to the panel.
- Tap the Settings icon on the right side of the widget field.
- Tap the Size setting and select one of the available sizes.
- Switch to the Off position, in the Show icon field.
Panels Customization
Widget Context Menu
- Android
- iOS
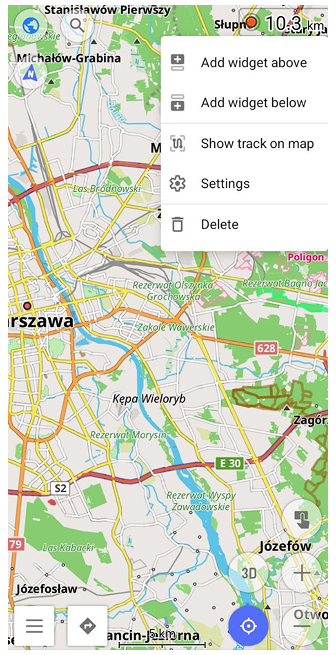
The widget context menu provides a quick way to manage and configure widgets directly from the map screen. You can access it by long tapping any widget to customize the layout of widgets without leaving the map.
-
Add widget to the Right/Left (only for Top and Bottom panels)
- Select a position for the new widget relative to the current one.
- Choose the widget from the Available widgets list.
-
Add widget Above/Below (only for Left and Right panels)
- Select whether to position the new widget above or below the current widget.
- Tap the required widget in the list to add it to the specified position.
-
Settings
- Access the widget’s settings (if available) to customize its appearance or behavior.
-
Delete
- Remove the widget from the panel.
- A confirmation prompt ensures the action is intentional.
-
Show track on map
- Available for the Trip Recording widgets.
- Displays your currently recorded track on the map.
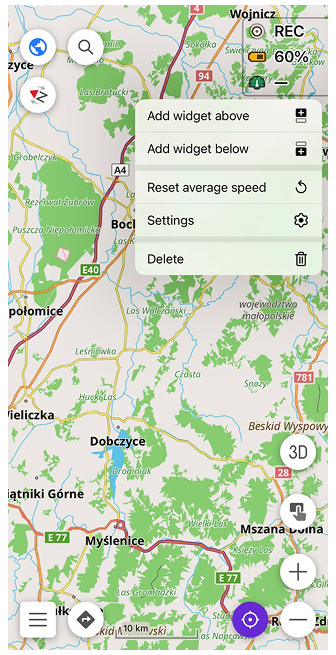
-
Reset average speed (example of Widget specific actions)
- Available for the Average Speed widget.
- Long tap to instantly reset the speed value during a trip.
Copies of Widgets
OsmAnd menu → Configure screen → Widgets → Panel
OsmAnd allows you to add multiple instances of the same widget to different panels or pages. This feature is particularly useful when you need consistent information across different views or profiles.
How to duplicate widgets:
- Add the widget. Navigate to: OsmAnd menu → Configure screen → Widgets → Panel → Add widget.
- Duplicate using the context menu. Tap the widget and select Duplicate from the list of actions.
- Alternative method. Select the same widget from the Available widgets list and tap Add.
Move or Delete
OsmAnd menu → Configure screen → Widgets → Panel
- Android
- iOS
You can rearrange or remove widgets from the application screen using the Edit mode.
How to move a widget:
- Go to: OsmAnd Menu → Configure Screen → Widgets → Panel → Edit button.
- Long tap the icon on the right of the widget.
- Drag it to the required position in the widget list.
How to delete a widget:
- Follow the same steps as above.
- Tap the minus icon to the left of the widget name.
- Confirm the deletion when prompted.
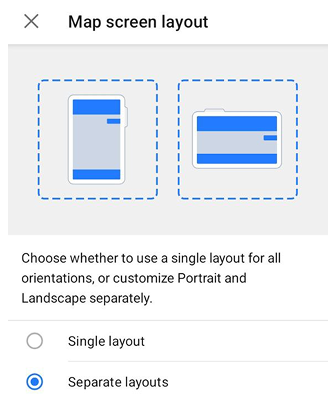
Map Screen Layout
This feature is currently not available for the iOS version of the OsmAnd app.
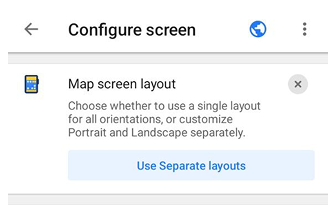
The Map screen layout setting allows you to control how widget panels are arranged on the map screen. It helps prevent widgets and buttons from overlapping and improves screen space usage, especially when switching between portrait and landscape orientations.
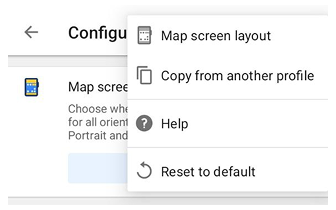
You can open the Map screen layout settings from the Configure screen menu, either directly from the screen actions or via the three-dot menu.
Single & Separate Layouts
Go to: Menu → Configure screen → ⋮ → Map screen layout
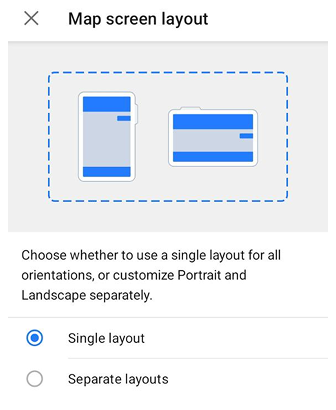
OsmAnd supports two layout modes for the map screen:
- Single layout – uses the same widget layout for all screen orientations. This option is selected by default.
- Separate layouts – allows you to configure different widget layouts for Portrait and Landscape orientations.
When Separate layouts is enabled, changes made in one orientation do not affect the other. This is useful if you want to optimize the map screen differently for portrait and landscape use.
Portrait & Landscape Tabs
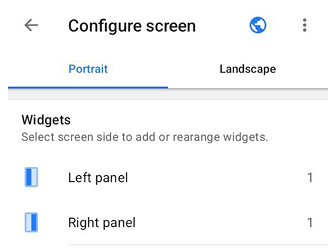
When Separate layouts is enabled, two tabs become available in the Configure screen: Portrait and Landscape. Each tab represents an independent layout for the corresponding screen orientation. You can switch between tabs by tapping them.
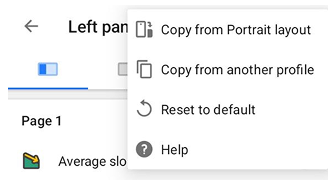
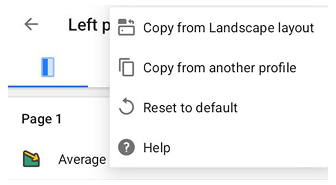
You can copy the layout between orientations. To access these actions, tap the three-dot menu for the widget panel:
- Copy from Portrait layout – copies the widget list from the Portrait layout to the Landscape layout.
- Copy from Landscape layout – copies the widget list from the Landscape layout to the Portrait layout.
Only the widget list is copied, and the operation applies within the same profile.
Panels Layout
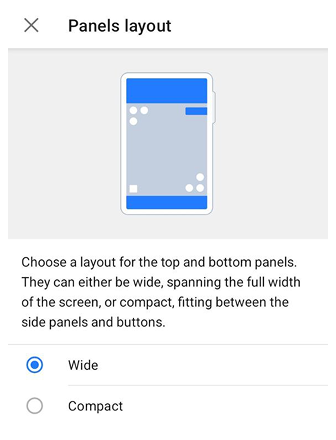
The Panels layout setting controls how the top and bottom widget panels are displayed.
Note: This option is available only when Separate layouts is enabled.
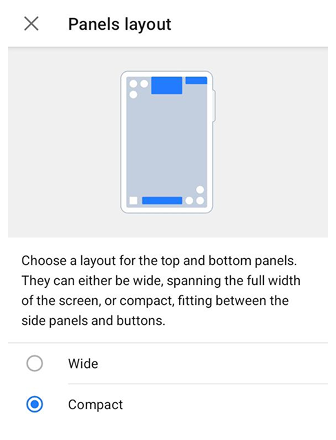
You can choose between two modes:
- Wide – the top and bottom panels span the full width of the screen.
- Compact – the top and bottom panels fit between the side panels and map buttons.
Panels layout can be configured independently for Portrait and Landscape orientations, allowing better adaptation to different screen sizes and orientations.
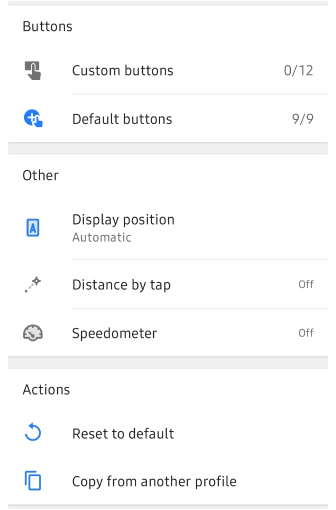
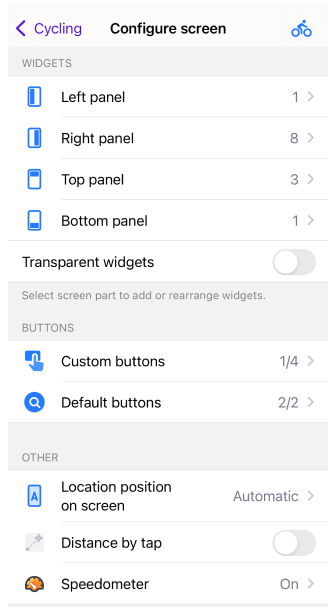
Buttons
Custom Buttons
- Android
- iOS
Go to: Menu → Configure screen → Buttons

Go to: Menu → Configure screen → Buttons

Quick Action (Custom buttons) allows you to add a list of single actions from all available Quick actions. These actions can be assigned to one or more widget buttons on the map screen. Custom buttons provide quick access to frequently used actions.
Default Buttons
- Android
- iOS
Go to: Menu → Configure screen → Buttons
Go to: Menu → Configure screen → Buttons
Default buttons allow you to customize which preset map buttons are visible on the map screen. Each button in the list has an On/Off switch next to it. You can choose to hide or show the following buttons:
-
3D mode. For iOS, the button is always available. For Android, it appears in the list and is available for setting if the map rendering engine Version 2 (OpenGL) is selected.
-
Compass. Indicates how the map is oriented on the device.
3 views: Always visible, Always hidden, Visible if map is rotated. -
Configure map. Access options to modify the map's style, layers, and additional settings.
-
Menu. Opens the main application menu for accessing all features.
-
My location. Centers the map on your current position.
-
Navigation. Essential for route planning and starting navigation.
-
Search. Opens the search tool for finding locations.
-
Zoom in / out. Adjusts the map's zoom level to show more or less detail.
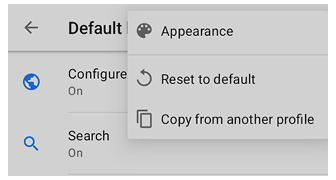
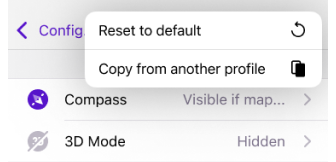
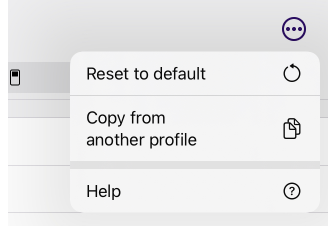
The three-dot menu on the Default buttons screen contains actions such as:
- Reset to default. Allows you to return the button settings to their original appearance.
- Copy from another profile. Select a profile from the list to copy button visibility and appearance settings.
- Appearance (Android only). Offers a variety of customization options for these type of buttons. To modify a button's appearance, tap the required button from the list and select the Appearance option.
Button Appearance
- Android
- iOS
Go to (for Custom buttons): Menu → Configure screen → Custom buttons → Quick action → three-dot menu → Appearance
Go to (for all Default buttons): Menu → Configure screen → Buttons → Default buttons → three-dot menu → Appearance
Go to (for a specific Default button): Menu → Configure screen → Buttons → Default buttons → select a button → Appearance
Go to (for Custom buttons): Menu → Configure screen → Custom buttons → Quick actions → three-dot menu → Appearance Go to (for a specific Default button): Menu → Configure screen → Buttons → Default buttons → select a button → Appearance
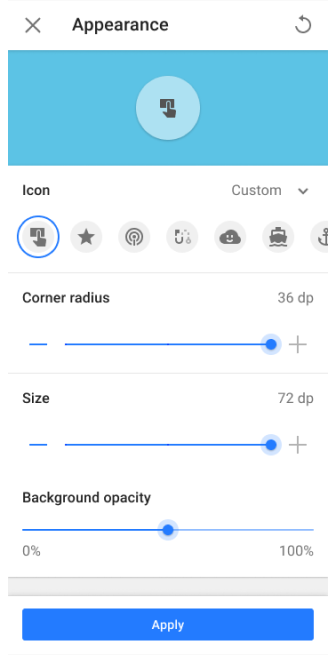
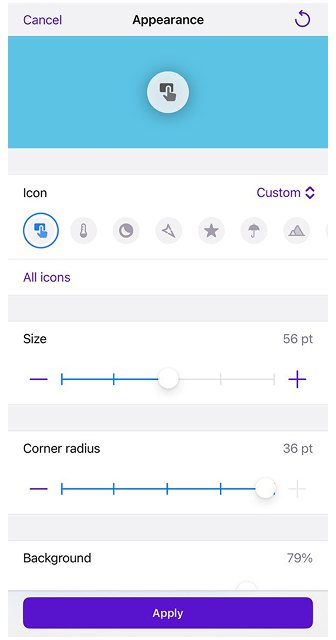
The Button appearance feature enables you to fully customize the look of buttons on your map interface. These customization options are available for both Quick Action (Custom buttons) and Default buttons, providing comprehensive control over the map interface's appearance and allowing precise adjustments to button design.
Customization options:
- Icon. Select from a list of icons that represent actions you’ve already added, making it easy to identify functions at a glance.
- Corner radius. Adjust this setting to change the shape of the button, ranging from sharp, square corners to smooth, rounded edges.
- Size. Choose the button size that best fits your screen and stands out as needed.
- Background opacity (Android) / Background (IOS) . Control the visibility of the button’s background. You can set it to be fully visible or partially transparent, or display only the frame shadow and icon.
Other
- Android
- iOS
Go to: Menu → Configure screen → Other

Go to: Menu → Configure screen → Other
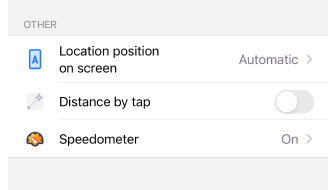
- Display position / Location position on screen. ⬇
- Distance by tap. ⬇
- Speedometer. Shows the current speed based on GPS data and limited speed based on OpenStreetMap data. The displayed data also depends on OsmAnd's Speed Limit Tolerance setting.
Display Position (Location position on screen)
- Android
- iOS
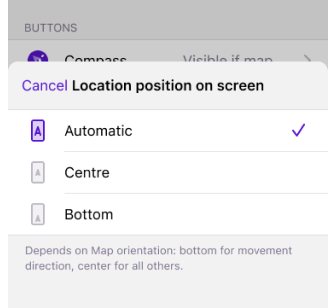
Location position on screen is the name of this setting in the iOS version of OsmAnd.
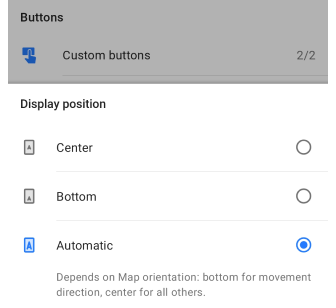
Allows you to set the placement of the cursor to My location on the OsmAnd map. There are three options available:
- Center. The cursor is always positioned in the center of the screen.
- Bottom. My location is placed slightly below the center of the screen. This mode allows you to see more map information ahead of your movement, which is useful during navigation.
- Automatic. Places My location depending on Map orientation (Bottom - for movement direction, Center - for all others).
Distance by Tap
- Android
- iOS
The Distance by Tap tool allows you to measure distances between points on the map without using the Radius Ruler or creating a route.
There are two use cases:
-
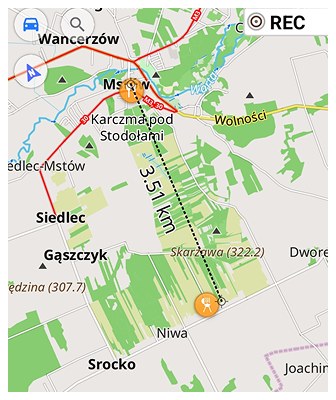
Distance from your location to a point
Tap anywhere on the map and a straight line will appear from your current location to the tapped point, along with a distance label. The line remains on screen even if you tap elsewhere. -
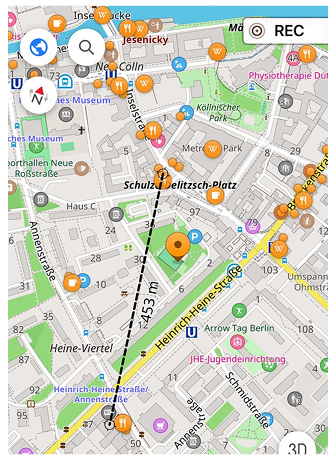
Distance between any two points
Tap two points on the map simultaneously (multi-touch). A line connects the two points, and the measured distance is displayed.
You can also adjust the text size of the distance label. Go to: Menu → Configure screen → Other → Distance by tap → Text size. Choose between Normal (default) and Large (1.5× bigger). When the Large option is selected, extra spacing is automatically added between the line and the label for better readability. Changes apply instantly without restarting the app.
Actions
- Android
- iOS
Go to: Menu → Configure screen → Actions

Go to: Menu → Configure screen → Any panel
Access to additional actions in the Configure screen are:
- Android. Located in the Configure screen at the bottom of the screen in the Actions section: Menu → Configure screen → Actions.
- Android / iOS. Located on the screens of each Panel in the three-dot menu in the upper right corner of the screen.
Available actions:
- Reset to default. This feature allows you to reset all settings to default values if you want to start over, or use only the preset ones when starting OsmAnd.
- Copy from another profile. This feature allows you to quickly import settings from another profile, select the required ones from the list, and copy.
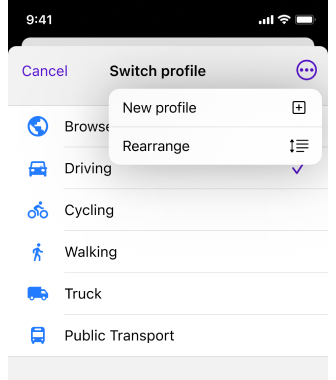
Switch Profile
- Android
- iOS
- For Android devices, you can change profiles at the top of the Configure Screen home screen using the available profile icons.
- If you are using an iOS device, tap the profile icon in the top corner of the Configure Screen home screen and select the required profile from the list to activate it.
Take a note: The Switch profile option does not display all existing profiles, but only those that have been switched on in the Settings menu.