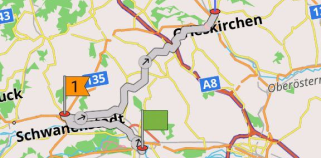
Map Screen During Navigation
Overview
This article describes how to configure the appearance of the map during navigation. This includes features such as displaying POIs along the route, using screen alerts, route line appearance including color, width, and turn arrows. These features are closely related to the route navigation settings.
Map During Navigation
- Android
- iOS
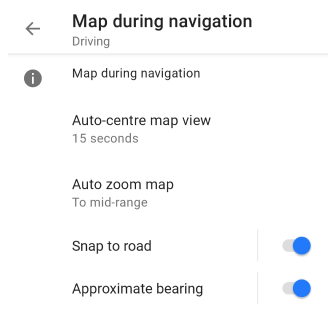
Go to: Menu → Configure profile → Navigation settings → Map during navigation
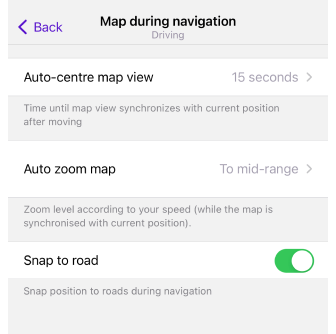
Go to: Menu → Settings → App profiles → Navigation settings → Map during navigation
When navigating, the map is a visual tool to locate your position, identify your destination plan your route, and view navigation guidance. You can use zooming to do this and drag and rotate the map as needed. The map can also display road information, street names, buildings, and other objects to help you easily determine your route.
During navigation, the map's appearance adjusts based on the selected navigation profile. Before starting navigation, ensure that the map's appearance aligns with your preferences for how it should function while driving.
| Parameter | Description | Note |
|---|---|---|
| Auto-center map view | The time for which the map view is synchronized with the current position after moving. | Value: Never, 5 sec, 10 sec, 15 sec, 20 sec, 25 sec, 30 sec, 45 sec, 60 sec, 50 sec. |
| Auto zoom map | Automatically scale the map according to your speed, as long as the map is synchronized with your current position. | Value: No auto zooming - manually zoom. To long-range - zoom is 200 m. To mid-range - zoom is 100 m. To close-up - zoom is 5 m. |
| Snap to road | The current position icon will be associated with the current navigation route. | You can turn this option off, but all road-related options, such as lane display, will also not be visible during navigation. |
| Approximate bearing | Determines bearing based on the navigation route you are following. | The setting is only visible when the OsmAnd development plugin is enabled. These settings should be enabled if the orientation of the directional map is flipped or jiggles when using Android Auto. |
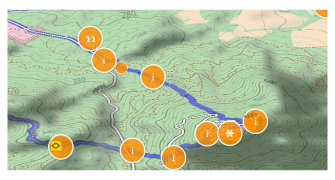
Show Points Along the Route
The Show along the route setting allows you to configure additional route parameters and is required for the operation of widgets such as the Street name and the Alert widget. Options include displaying POIs and My Favorites along the route or using them as an addition to those already configured for the profile, as well as displaying a complete list of Traffic warnings along the route.
- The ability to set different distances (up to 5 km, or 3.11 miles, depending on the unit of length you set) from the route to nearby points is useful when using routing types such as Straight Line or Direct-to-point.
- For the Show along the route setting, it is recommended to use Voice prompts for navigation.
- POIs, Favorite, and Traffic warnings are not displayed in the list for a route you have already traveled.
View and Select Points
- Android
- iOS
Go to: Menu → Navigation → Settings → Show along the route

Go to: Menu → Navigation → Settings → Show along the route

When you create a route, you can set the types of points to be displayed along the route in the Navigation section.
Points of Interest (POIs)
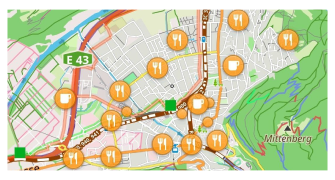
POIs settings in Menu → Configure map → Shows → POI overlay… are associated with the Show along the route setting. This is essentially an additional setting for displaying POIs on the map, directly related to the created route.
When you specify the display of certain POIs on the Configure map, they are all displayed on the maps you have downloaded, whether you have selected categories or, if you do not care which category, selected nearby POIs.
-
The number and identification of POIs is scale dependent.
-
The Show along the route setting displays the same category as in the POI overlay, but you see the entire list of selected POIs at once, starting from the point of the current location at the set distance within your route.
-
You can remove unnecessary POIs from the list or edit them in the Сontext menu by tapping one of them.
-
The list contains the selected POI types and brief information about each of them, such as the type icon, name, distance from the current location point to the POI along the route, and indications of which side of the route in a straight line and how far away the POI is.
My Favorites
The list contains all previously added Favorite points near the route you have created. As with POIs, you can select the distance at which these points are located.
-
If you turn off the display of Favorites on the map, they do not disappear from the list and continue to be displayed in the widget and announced when you approach them.
-
You can add your Favorite points to the map not only in advance but also while navigating a route.
-
To update the list, toggle My Favorites off and then back on.
-
Each point contains a name or coordinates, a group, the distance from the current location point to the Favorite directly on the route line, information about how far to the right or left the point is from the line, and the direction of the route.
Traffic Warnings
Traffic warnings are not displayed directly on the map like POIs or My Favorites.
-
To enable this option and see the warnings, you must first enable and configure the Alerts widget.
-
The choice to display Traffic warnings along your route allows you to see the entire list just before you start your route, which is useful when planning your trip.
-
You can remove unnecessary alerts from the list, or tap on the alert name to edit the location.
Screen Alerts
- Android
- iOS
Go to: Menu → Configure profile → Navigation settings
Go to: Menu → Settings → App profiles → Navigation settings
| Parameter | Description | Note |
|---|---|---|
| Screen alerts | Notifications, such as traffic warnings or speed limits, will appear on the screen as a widget. They appear in the bottom left corner while you are navigating. | Types of alert widgets |
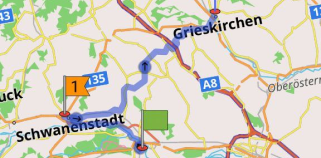
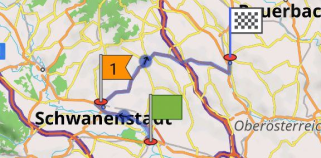
Route Line Appearance
- Android
- iOS
Go to: Menu → Settings → Configure profile → Navigation settings → Customize route line

Go to: Menu → Settings → App profiles → Navigation settings → Customize route line
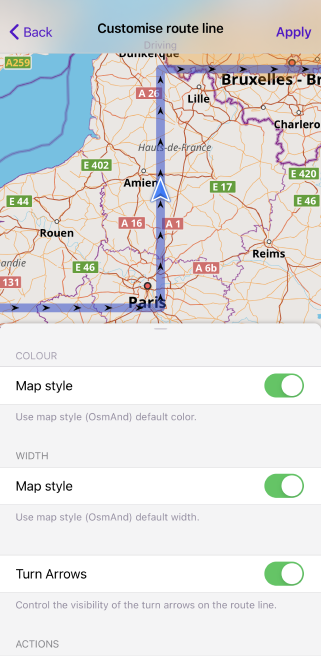
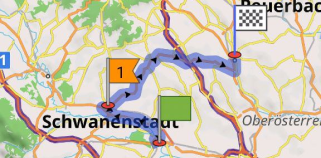
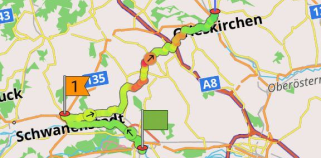
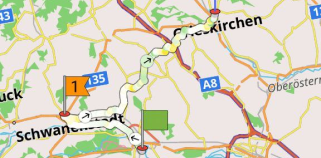
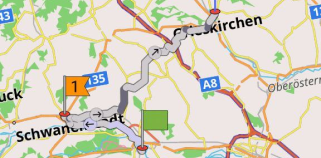
You can select route line appearance by style or manually select the color, width, and transparency of the line. In addition, you can choose whether to show turn arrows and direction arrows on the line.
Advanced: the Customize route line setting allows you to adjust the appearance of the route line to display elevation changes, significant uphill or downhill, ice on the road, unpaved roads, highways, and other possible obstacles. You can also select or create custom color schemes to apply to the route line.
 Some parameters you can use only with OsmAnd Pro subscription.
Color
The Color setting changes the color tones of the route lines. Their overall color changes depending on the selected type from the OsmAnd collection, and according to the Map Legend. Alternatively, their color becomes whatever color and transparency you set manually.
-
Map style. Used with the default colors. For a full description of the colors, go to Default Map styles.
-
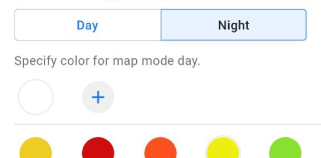
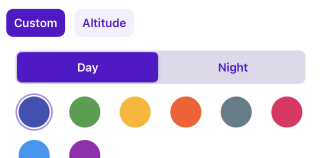
Custom. Allows you to select a line in any preferred color and transparency. You can select different settings for the day map and separately for the night map.
-
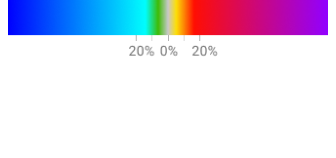
Altitude. It shows the height of the route point as a green-yellow-red gradient. Green indicates the lowest point of the route, yellow indicates the average height of the point, and red is the highest. If the route altitude difference is < 100 meters, the gradient is partially applied or not applied, for example for a simple climb from 100 meters to 150 meters - the gradient will be green-yellow. Note that the color doesn't represent the absolute value of the altitude.
-
Slope. The route line is colored in different colors depending on the elevation profile of the route. A detailed description is in the Topography plugin article, Slope section.
-
Road type. Colors a route or track line according to the road classification. A detailed description is in the Vector Maps - Road Style section.

-
Surface. Provides information about the physical surface of the road or trail. A detailed description can be found in the OsmAnd Map Style - Surface article in the Map Legend section.
-
Smoothness. Road or trail maneuverability classification for wheeled vehicles, especially concerning the regularity and smoothness of the surface. A detailed description can be found in the OsmAnd Map Style - Smoothness article in the Map Legend section.
-
Winter and ice roads. Colors a route or track line according to the winter road classification. A detailed description can be found in the Vector Maps article, Winter and ice roads section.
-
Surface firmness. Coloring of a route or trail line by pavement composition. Typically, used when the road network is largely unpaved. A detailed description can be found in the OsmAnd Map Style - Surface firmness article in the Map Legend section.

-
Difficulty of horse trails. Render paths according to the difficulty of horse trails.
Width
You can adjust the width of the route line to align with the road or path displayed on the map. For clearer visual identification, you can manually increase or decrease the line width as needed. For more details, refer to the Tracks and Routes — Appearance article.
-
Map style. It's used with the default width set by OsmAnd. A full description can be found in the Vector Maps article, Map style section.
-
Thin, Medium, and Bold widths. You can select the width of the line to match the width of the road, or emphasize the route line more strongly on the map.
-
Custom. It allows you to display a line of the width you require. Use the slider bar to select the width.

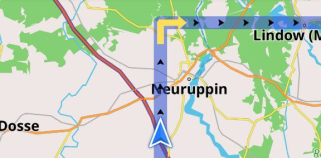
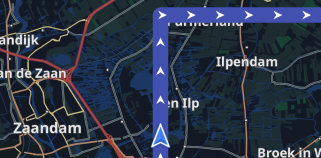
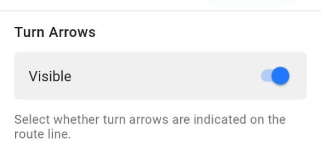
Turn Arrows
The Turn Arrows setting allows you to select whether turn arrows are displayed on the route line.
-
On map
-
In app

Related Articles
- Route parameters
- Route preparation
- Navigation by track
- Navigation by markers
- Route details
- Navigation settings
- Voice prompts / Notifications
- Android Auto
- CarPlay
Last updated: December 2024