Interact with Map
Overview
This article explains how to customize and interact with the map using various buttons and gestures. It covers how to rotate, zoom, adjust the view angle, and change the map's view angle, rotate it manually or automatically using the compass, or according to bearing.
Gestures
Gestures are essential for navigating the map easily and intuitively.
| Map Action | Gesture |
|---|---|
| Move | Tap and hold the map with one finger, then drag to move around. |
| Slide | Swipe the map with one finger. |
| Zoom In | Double tap the map with one finger. Double tap with one finger and swipe down. Pinch with two fingers to zoom in. |
| Zoom Out | Double tap with two fingers. Double tap with one finger and swipe up. Pinch with two fingers to zoom out. |
| Rotate | Tap the map with two fingers, then rotate your fingers in a circular motion. |
| Tilt (3D) | Tap with two fingers and move them up or down. Available only with Map Rendering Engine version 2 (OpenGL). |
Slide animations can be disabled in the settings with a special option.
My Location and Zoom

My location.
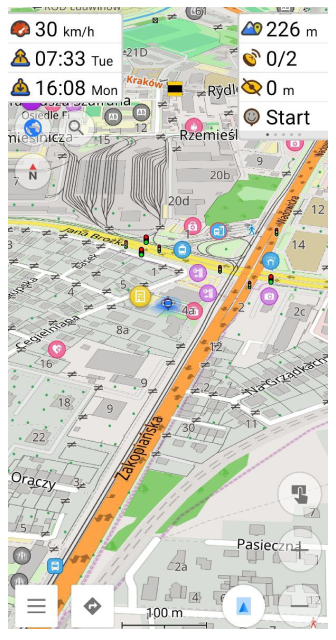
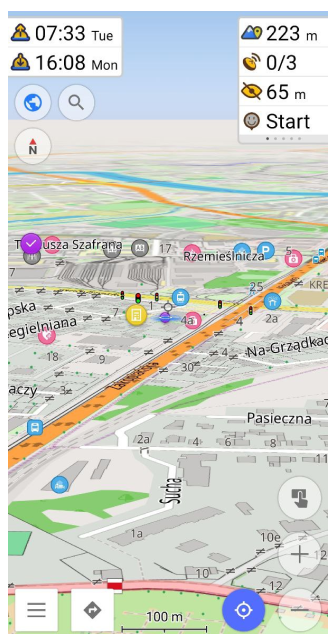
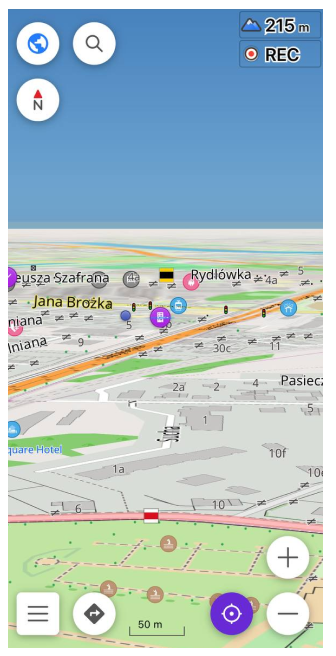
The My Location button is a circular icon that indicates whether the map's center is synchronized with your device’s current geolocation. Often referred to as the "Where am I?" button, it helps you quickly find your location on the map. During navigation, the map typically stays synced with the device's location, so the button remains hidden. However, it becomes visible if the map and your location go out of sync due to user interaction. Tapping the button will re-center the map on your current location, and a double tap will switch the view to 3D mode.
-
The My Location button has the following states:
- Full blue icon. The location is found but not synced with the map.
- White icon. The location is found and synced with the map.
- Grey icon. The location has not been found yet.
- Arrow icon. 3D mode is activated.
-
Long tap (Android) the My Location button opens the map context menu, allowing you to share your location.
Zoom buttons.
Zoom buttons are always visible next to My Location and allow you to control the map's zoom level.
- Changing the zoom level does not affect the map's synchronization with your location.
- Long tap Zoom buttons opens Map magnifier dialog,allowing you to adjust map detail levels.
- Keep in mind that during navigation, the zoom can be controlled automatically by the Auto zoom setting:
- Android: Menu → Settings → App profiles → Navigation settings → Map during navigation → Auto zoom map
- iOS: Menu → Settings → App profiles → Navigation settings → Map during navigation → Auto zoom map
My Location Appearance
You can customize My Location button icons using Profile appearance settings. Read more about how to do this here.
Map Magnifier
The Map Magnifier is a tool that enhances the map's visibility, similar to a magnifying glass used with paper maps. It allows you to zoom in on the map to view text and details more clearly or to adjust the level of detail while maintaining the same scale. For more information, go to Vector Maps article.
Map Orientation Modes
- Android
- iOS
Go to: Menu → Settings → Profiles → General settings → Appearance → Map orientation
Go to: Menu → Settings → Profiles → General settings → Appearance → Map orientation

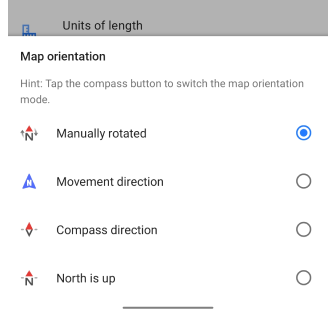
Map orientation modes allow you to choose how the map is displayed on the device screen. OsmAnd offers modes such as Manually Rotated, Movement Direction, Compass Direction, and North is Up. Enabling each mode changes the way the map is oriented according to the selected option. For full details, see the Map Buttons article.
Compass
- Android
- iOS
Go to: Menu → Configure screen → Buttons → Default buttons → Compass

Go to: Menu → Configure screen → Buttons → Default buttons → Compass
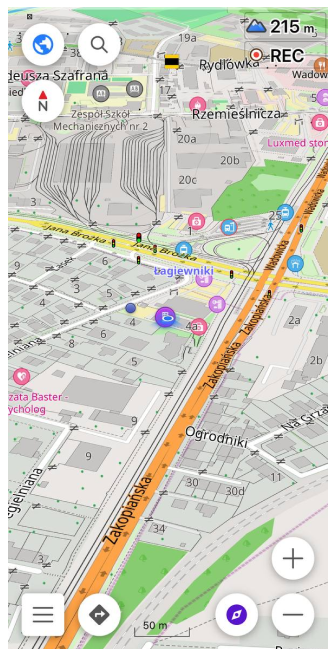
The compass button shows how the map is oriented. The red arrow on icons, or the direction of the arrow in Movement direction mode, indicates the North. The icon on the compass button indicates the current map orientation mode. The compass button widget offers three interaction options: Single Tap rotates the map to the North, Double Tap alternates between all map orientation modes, and Long Tap opens the list of modes.
Rotate Map by Bearing
In the rotate map by bearing mode (Movement direction), the map automatically aligns with your direction of movement, so the area ahead of you is displayed at the top of the screen. This mode enhances navigation by shifting the map center slightly downward, showing more of the route ahead. If you are stationary, the map stays fixed.
You can activate this feature via Menu → Settings → Profiles → General settings → Appearance → Map orientation or by double tapping the Compass button. For more details about bearing, see here.
Map Tilt and Horizon
- Android
- iOS
With new map rendering engine you can change camera tilt from 90 (no tilt) to 10 degrees. Approximately at a map tilt less than 20-22 degrees (this parameter depends on zoom level), the imaginary horizon line becomes visible. Unlike the real one, the program horizon is always straight.
Under the horizon, you can see so-called haze or fog. This area of the map is filled with grey color, only a few map details can be observed.
The use of fog is necessary since the display of remote objects on the map requires significant computing resources and is not always justified due to map distortions at small viewing angles. So the visible distance on the OsmAnd map is currently limited to 35 tiles.
Map tilt can be changed by a long tap on the screen with two fingers and moving them up/down. You can also change the tilt by tapping on the My location icon in the lower-right corner of the screen (only 45 and 90-degree positions are available).
You can not change the Camera tilt when the old map rendering engine (version 1) is on.
Touch Screen Lock
- Android
- iOS
Use the Touch Screen Lock feature to avoid accidental taps during navigation. This is especially helpful for activities like cycling or hiking, where unintentional touches might disrupt your route.
Unlocking.
Tap the on-screen button, or, if the lock is activated, via an external button (e.g., Volume Down), press the external button and tap the on-screen button.
Setup.
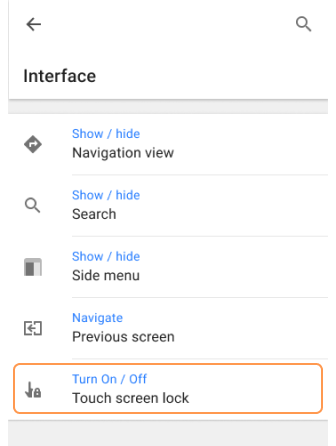
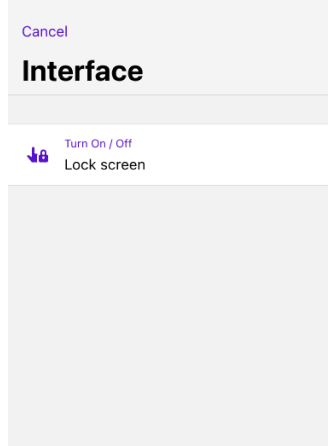
- Navigate to Menu → Configure screen → Custom buttons.
- Select + → Add action → Interface → Touch Screen Lock.
Clear on-screen messages will guide you when locking or unlocking the screen.
Settings
Extra Compass Settings
-
Use Kalman filter - Reduces noise in compass readings but adds inertia. Smoothes the rotation of the map with a slower rotation animation, although this introduces a slight delay, not more than 1 second.
Menu → Settings → Profiles → General settings → Other → Use Kalman filter -
Use magnetic sensor - For the compass reading, use the magnetic sensor instead of the orientation sensor. Smoothes the rotation of the map with a slower rotation animation, although this introduces a slight delay, not more than 1 second.
Menu → Settings → Profiles → General settings → Other → Use magnetic sensor
No Animations
This feature is currently not available for the iOS version of the OsmAnd app.
You can disable all map animations during map interactions, including gestures and buttons.
Menu → Settings → Profiles → General settings → Remove animations
Animate Own Position
Android: Menu → Settings → App profiles
iOS: Menu → Settings → Profiles → Navigation settings → Animate own position
Creates a smooth map panning effect versus the My Position icon when in motion. The effect introduces a slight delay versus ground truth of about 1 second. Enabling this has been reported to create some pronounced lag issues under some circumstances, disable it if such issues arise.
External Input Devices
External input device buttons provide a convenient and efficient way to interact with the map and the OsmAnd application interface. They are located on external devices, such as Bluetooth or other types of keyboards, specialized buttons on vehicle navigation devices, or WunderLINQ and Parrot controllers.
One of the main functions of buttons on external input devices is to zoom in and out of the map. They also allow you to navigate the map and change its orientation without having to tap and gesture on the screen. Buttons on external input devices support many other functions, such as opening the Main Menu.
The keyboard remains functional even when the External input devices option is turned off, and None is selected.
Preconfigured Input Device
- Android
- iOS
Go to: Menu → Settings → Profiles → General settings → Other → External input devices

Go to: Menu → Settings → Profiles → General settings → External input devices
To access the settings of an external input device, you need to enable this feature.
-
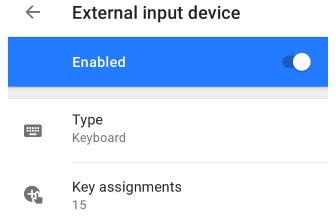
Go to the main Menu → Settings → select the Profile → General settings → Other → External input devices, and switch to Enabled.
-
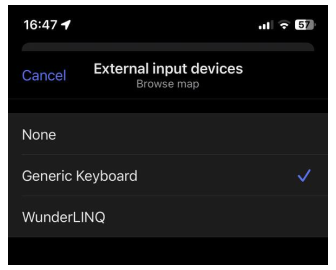
Select a device from those supported by OsmAnd by tapping the Type item in the list:
Keyboard, WunderLINQ, Parrot (Android only), or create your own type (Android only). -
There is a different defined action-key bundle assignment for each type of external input device. Tap the Key assignments to see a list of actions and keys. The table of keys is shown below.
-
You can read more about external input device actions on GitHub in the MapActivityKeyListener package.
| Key | Device | Action |
|---|---|---|
| C | Keyboard | Move - To My location |
| D | Keyboard | Change - Map orientation |
| N | Keyboard | Show / Hide - Navigation view |
| S | Keyboard | Show / Hide - Search view |
| P | Keyboard | Change - App profile to next |
| O | Keyboard | Change - App profile to previous |
| ↑ | Keyboard | Move - Map up |
| ↓ | Keyboard | Move - Map down |
| ← | Keyboard | Move - Map to the left |
| → | Keyboard | Move - Map to the right |
| + = | Keyboard | Map - Zoom in |
| − | Keyboard | Map - Zoom out |
| Press back | Keyboard | Navigate – Previous screen |
| ↓ | Wunderlinq | Map - Zoom out |
| ↑ | Wunderlinq | Map - Zoom in |
| ESC | Wunderlinq | Open WunderLINQ Datagrid |
| M (legacy Android) | Keyboard | Show / Hide - Side menu |
| Joystick press (legacy Android) | Keyboard | Move - To My location |
| Media button (Android only) | Keyboard | Show / Hide - AV notes |
| ← (Android only) | Parrot | Map - Zoom out |
| → (Android only) | Parrot | Map - Zoom in |
Custom Input Device Type
This feature is currently not available for the iOS version of the OsmAnd app.
Menu → Settings → Profiles → General settings → External input devices → Type → +

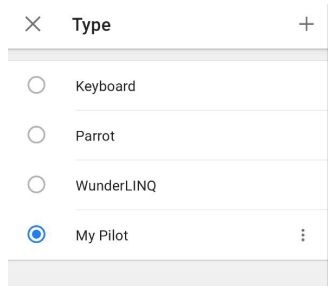
If you want to assign keys for an external input device (such as a keyboard, joystick, or controller), you need to create a device type: go to the External Input Device setting, select Type from the list, tap the "+" and enter a name. Each type has a menu with the following options: Rename, Duplicate, and Remove.
Add Action & Key Asssigments
After you have created a custom input type, you can assign the required actions to the keys. A wide range of action types from the Quick Action widget is available.
- Select a device type, then tap the Key assignments item.
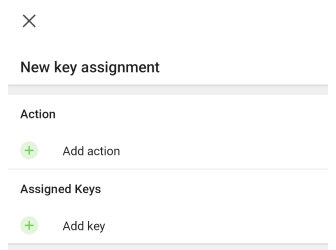
- Tap the Add button ( "+" ) in the bottom right corner of the screen.
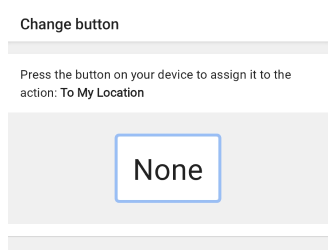
- Select the required action then tap the Add key field and tap the button on your device to assign it to the action.
- If the button you assign is already being used for another action, you will receive a notification with the option to reassign the button or cancel the assignment.
- Later you can change actions and key assignments or add other ones for already created actions, just select an item in the Key assignments list.
Delete Key assignment
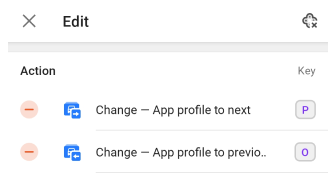
You can delete multiple unnecessary actions using the Edit button (pencil-shaped) in the upper right corner of the screen at once:
- Remove one action per action, with the "−" button in the item field.
- Remove all key assignments for the selected type by tapping the button in the upper right corner of the screen next to the Edit name.
Related Articles
- Map Context menu
- Configure Map
- Vector maps (Map styles)
- Raster Maps (Online / Offline)
- Points on the map
- Tracks and Routes
- Tracks Context menu
- Public transport
Last updated: December 2024