TET routes in OsmAnd

Hello, everyone!
We are glad to introduce you to the article from our Finnish advanced user Antti from his blog.
☛ Let's go!
- What is TET route?
- Import TET route
- Start navigation
- Creating profile for gravel roads
- Configure screen per profile
- Trip recording
- Change basemap
- Removing automatic centering
- How soon application should reroute
- Bonus: Custom map types
TET
TET (Trans Euro Trail) is an 80,000km GPX route from the edge of Africa to the Arctic Circle. Created by TET adventure motorcycle community.
Read more and find your route here.
Join to Public group on Facebook.
Import TET route
Often there is a question of where to get TET route. The only source for the correct and valid GPX file that holds the full route is Trans Euro Trail's own web page. Go there with your mobile select the country hit the Download GPX button and accept terms and rules. Once the GPX file is downloaded open it and you should see OsmAnd as a possible application to open the file.
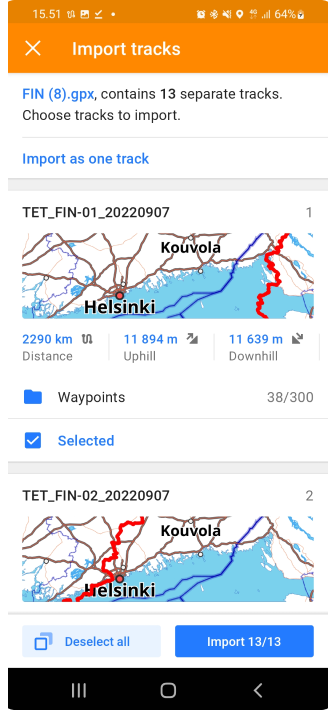
Once the application is opened you will see information about the GPX file. This GPX file contains 13 separate tracks and you can choose what tracks are imported or all. Click the Import 13/13 button to import selected tracks.
| Download TET route | Open it by OsmAnd | Import tracks screen in OsmAnd |
|---|---|---|
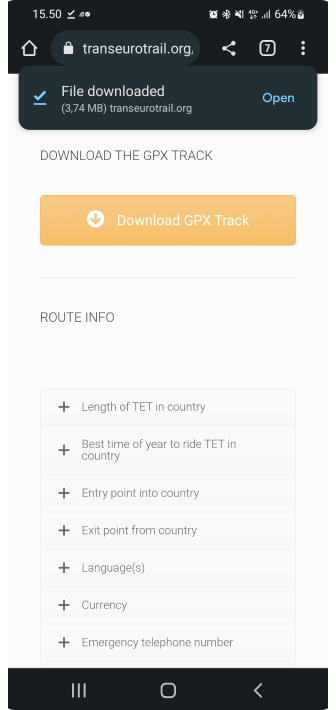 | 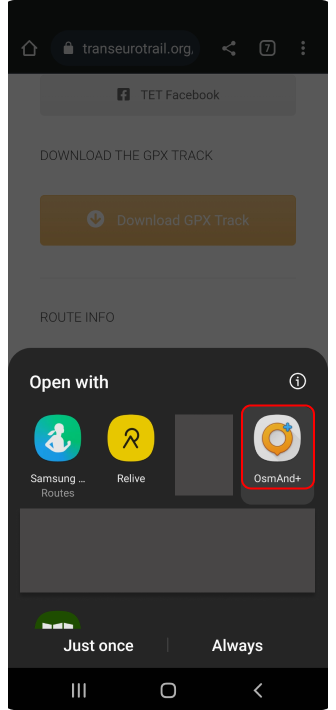 |  |
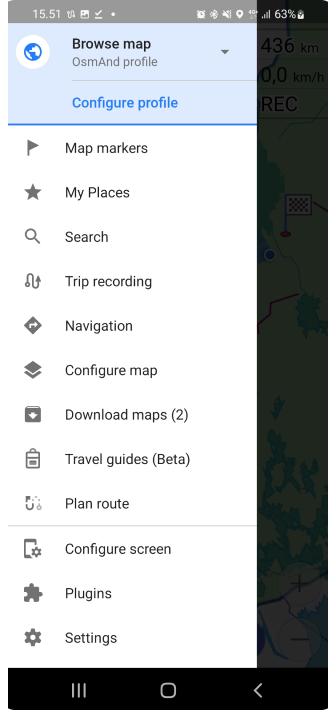
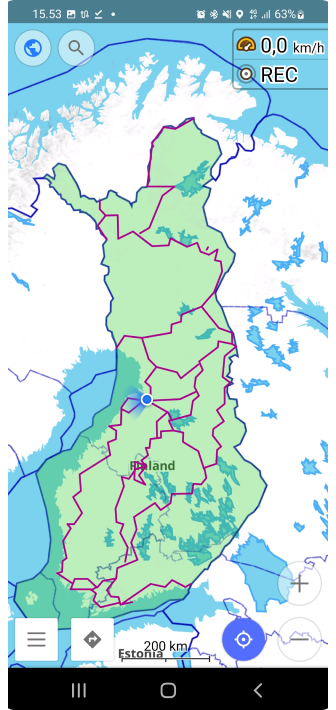
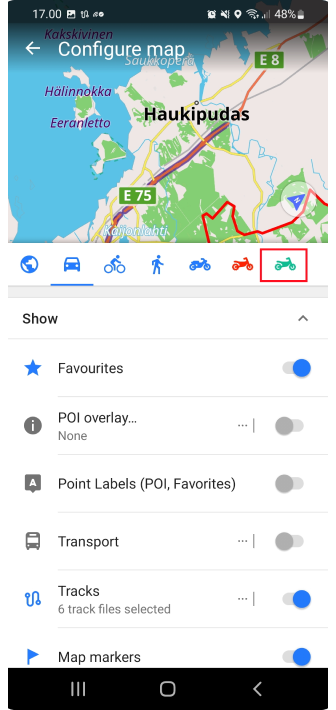
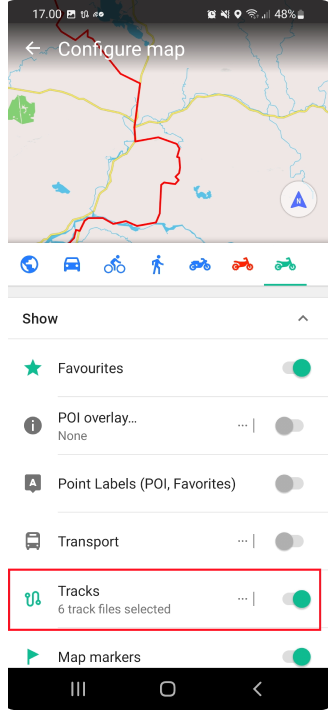
If tracks are not visible right away after import you need to make those visible from the menu:
OsmAnd Menu → Configure map → Tracks
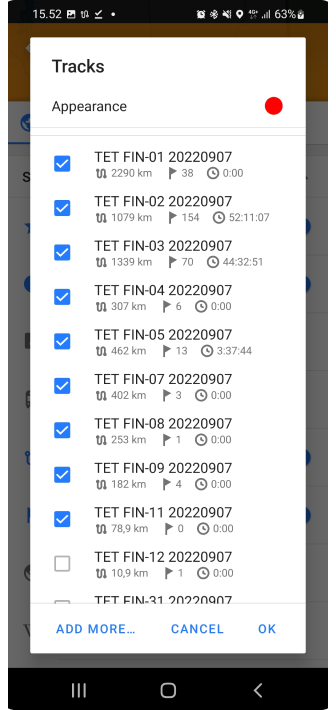
You will see all tracks that are available in the application. Select the ones that you imported and press OK.
 |  |  |
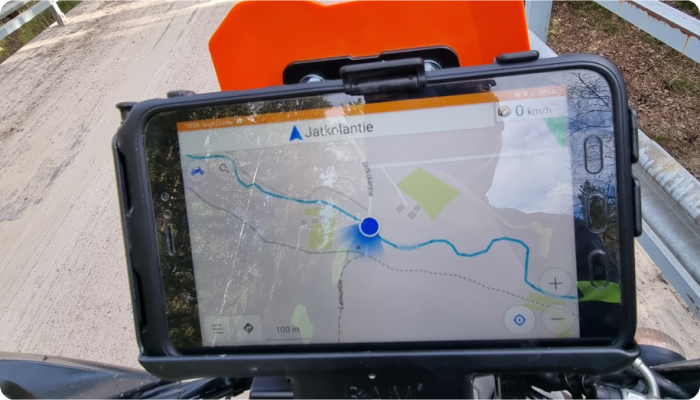
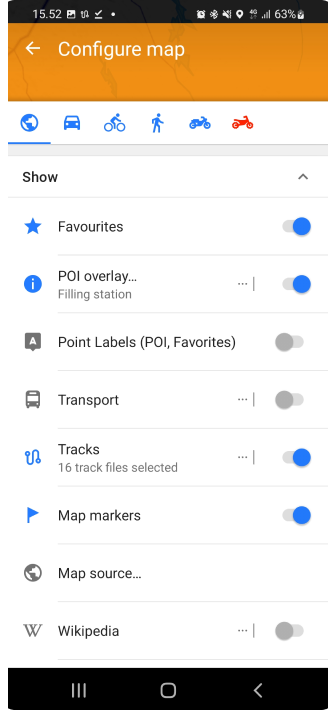
Now you can see that Tracks count is updated and when you press the back button you will see routes on the map.
 |  |
Start navigation
Navigation is started by clicking the track that you want to follow. Once you click track menu will open that tells basic information about the track like name and distance etc.
There are 4 main buttons that are from left to right: Hide track from the map, Change colors, Edit track, and Navigate. Click Navigate button. You will see direction of the route on the next screen.
| Tap a track | Follow track |
|---|---|
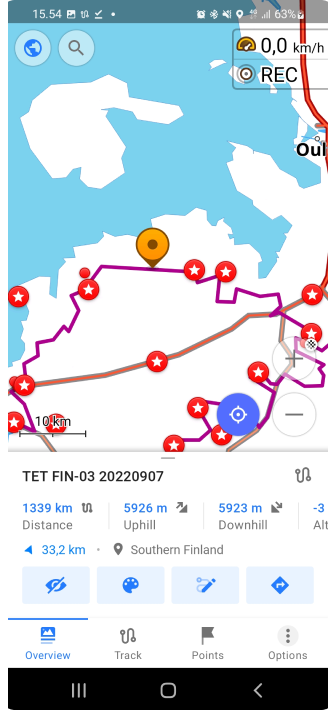 | 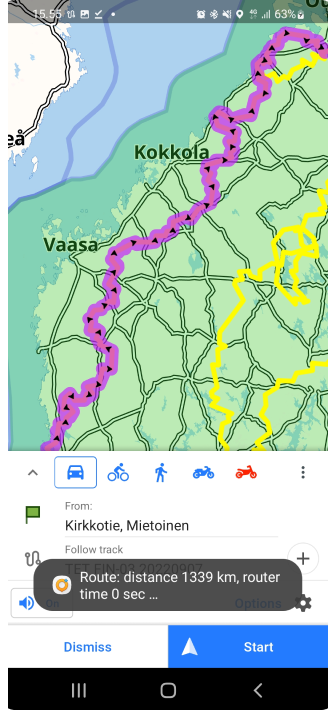 |
Quite often you might need to change direction if you are not located in a place where the track starts. This can be done by pressing options (gear icon top of the Start button). Then click close.
Then select Follow track and click Reverse track direction.
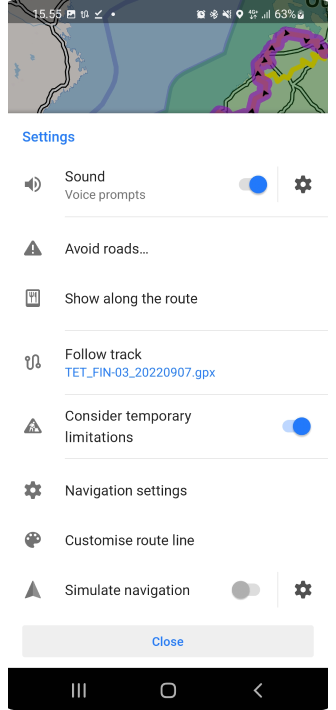 |  |
Now you can see that track arrows are pointing other direction.
 |  |
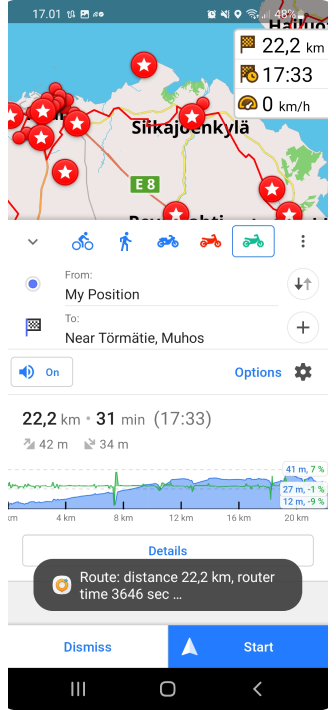
Now we can start navigation by pressing the Start button.
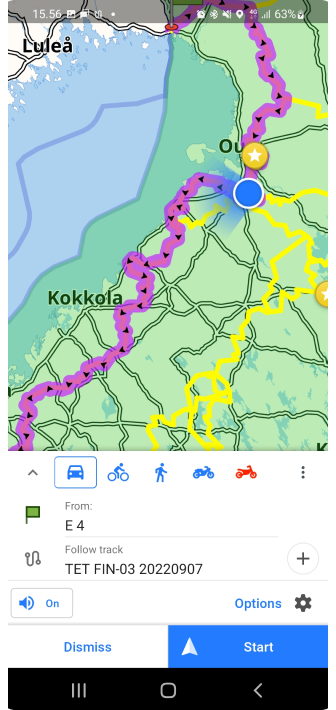 |  |
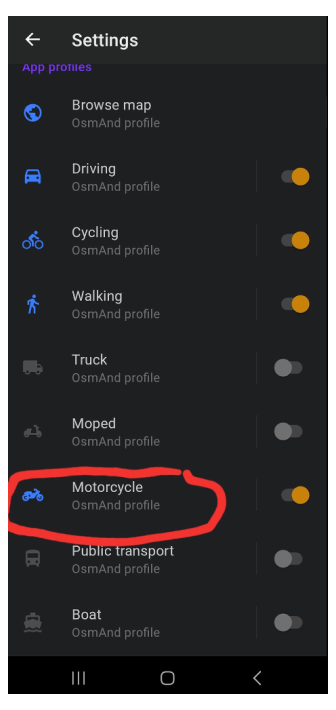
Creating profile
OsmAnd is the only application that allows you to create a profile that will route you through gravel roads always when possible. This will give great twist to planning trips. Just click the location on the map and then select navigate then the app will do the rest.
So how to do that? hit the OsmAnd menu and select Settings:
- Scroll page down
- New profile.
- Base profile is Motorcycle. Give a new name for Profile. Select colour and icon press the Save button.
| Settings menu | New Profile button | New Profile screen |
|---|---|---|
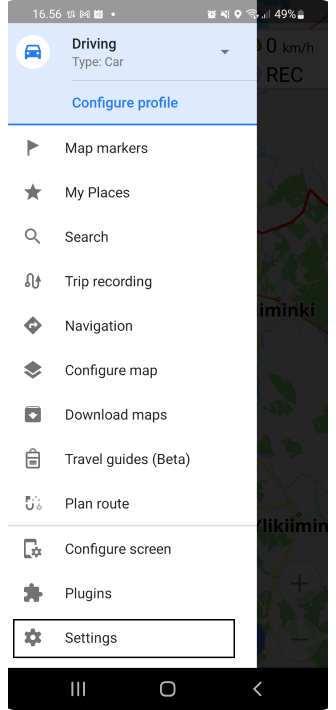 | 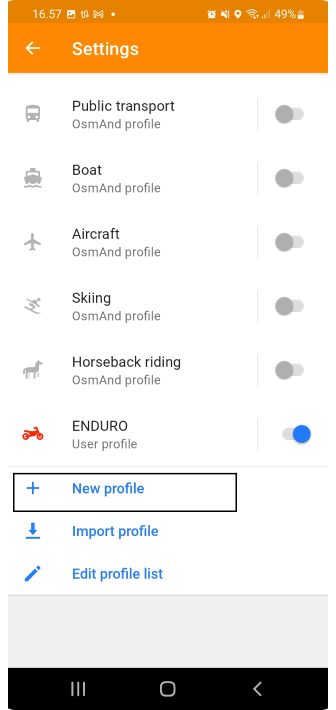 | 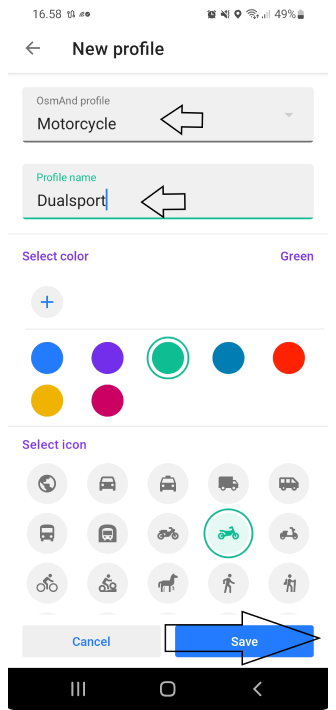 |
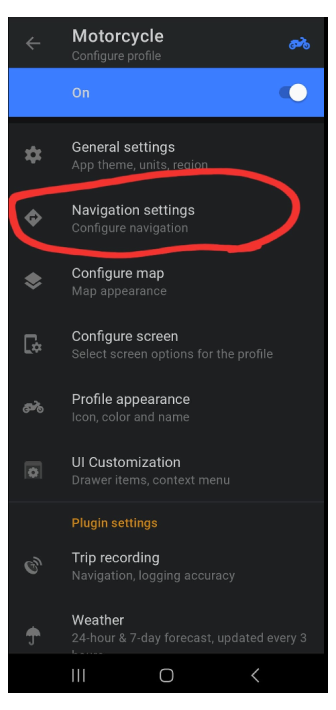
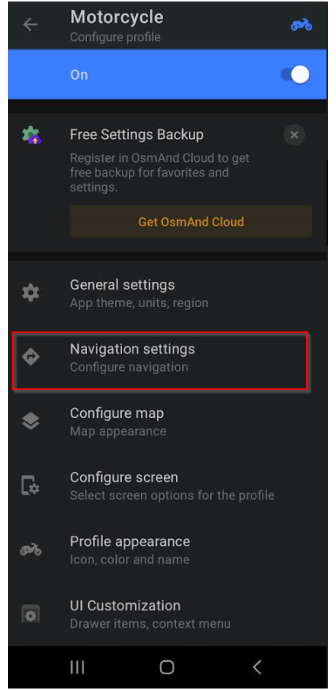
Now we have new profile, but we need to edit it to meet our expectations. This tutorial expects that you want to drive gravel roads. But you can modify all settings as you want.
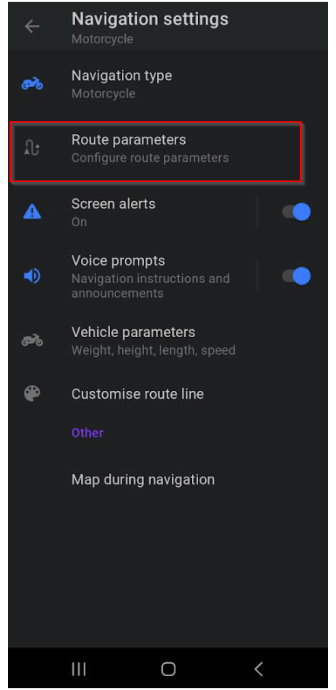
Click Navigation settings and then Route parameters:
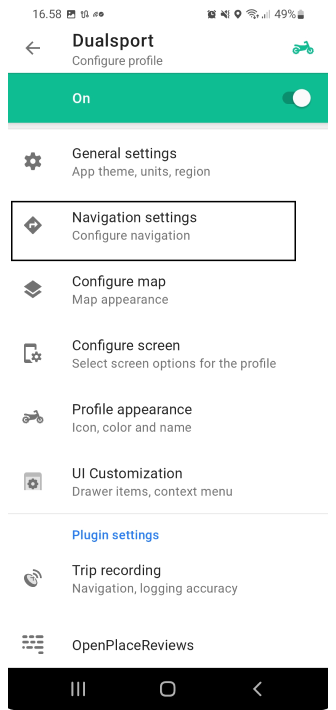 | 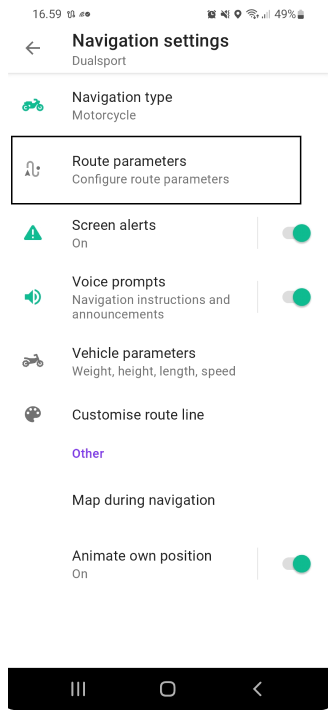 |
Remove Fastest route setting so the application routes you alternative routes. We want to avoid motorways (No motorways) but other roads are OK. Then we want to Prefer unpaved roads so we turn that on.
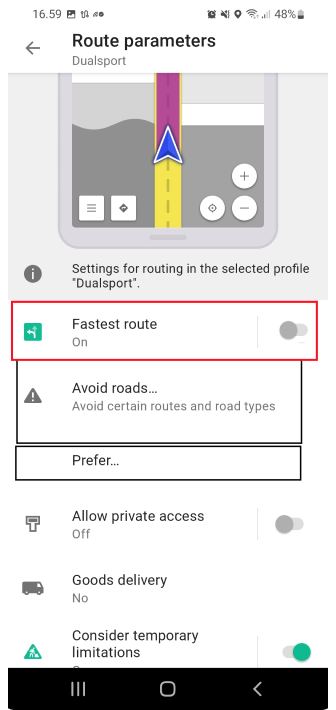 | 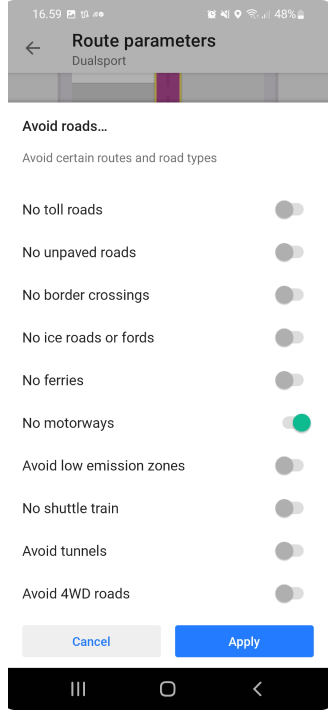 | 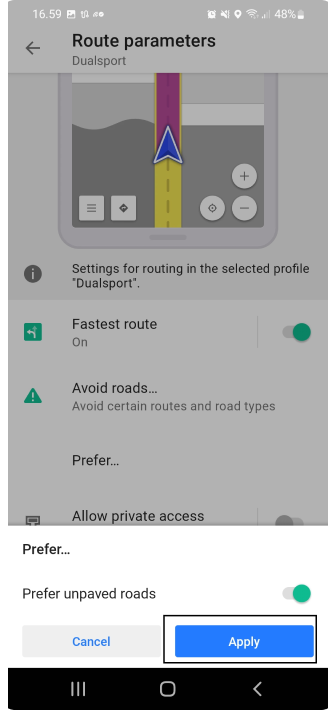 |
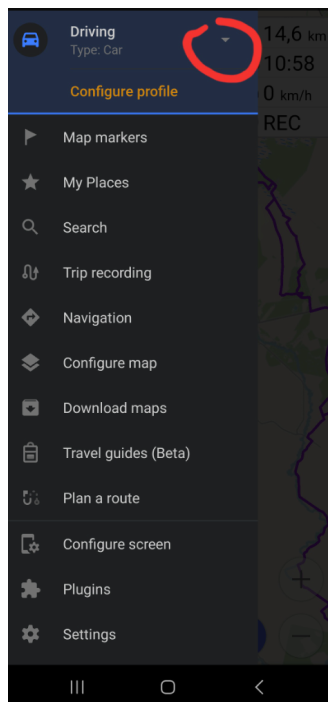
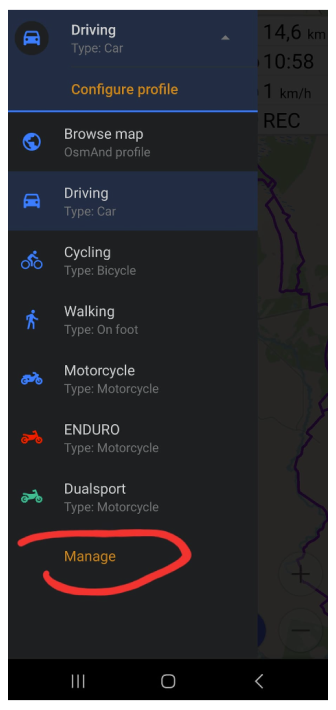
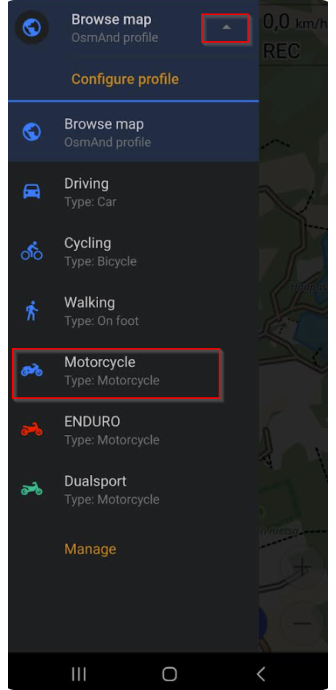
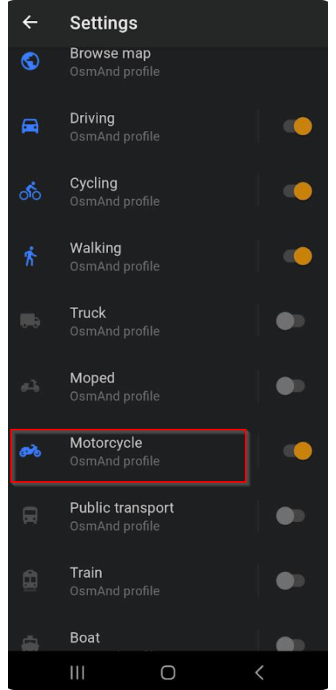
Then press back so you go back to the map. Now you can click the top left corner where is Profile icon. Select the newly created profile. You can see what tracks are visible etc.
(Change Profile order on the list: OsmAnd menu → Settings → Edit Profile list)
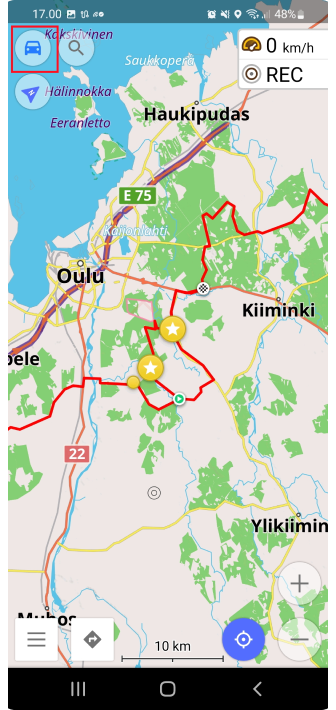 |  |  |
When you go to map and click someplace in the map and then press navigate it will follow your new Profile settings and create a route with given parameters.
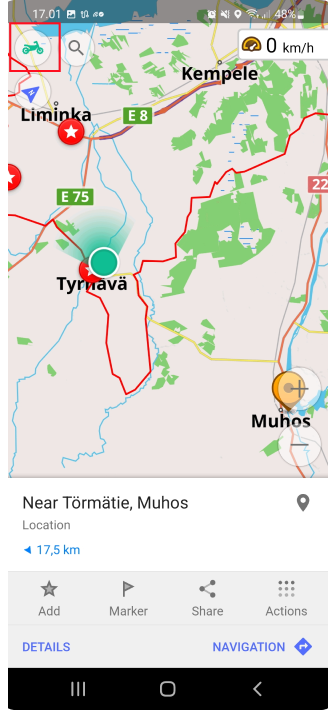 |  |
Configure screen
One important thing between profiles is that you can easily change what you want to see on the map. It might very that if you ride bigger roads you might want to see the speed limit indicator and you might want to see your current speed etc, When you are off roading it might not be so relevant information. Let's say we want to remove speed information from the screen for this Dualsport profile.
So Lets do following:
- go to OsmAnd Menu
- Click Settings
- Click the profile that you want to edit
- Click Configure screen
 |  | 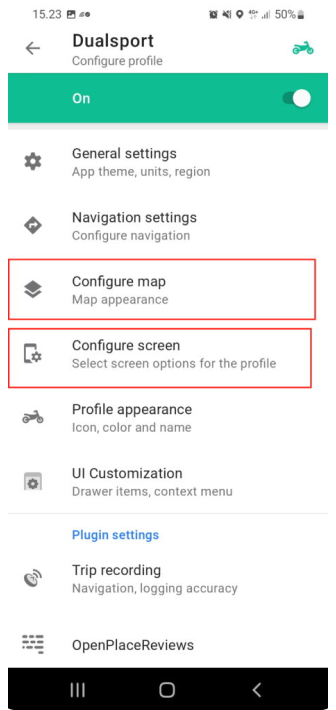 |
I also wanted to highlight Configure map if you want to use a different map for this profile than what other profiles are using it can be done from there.
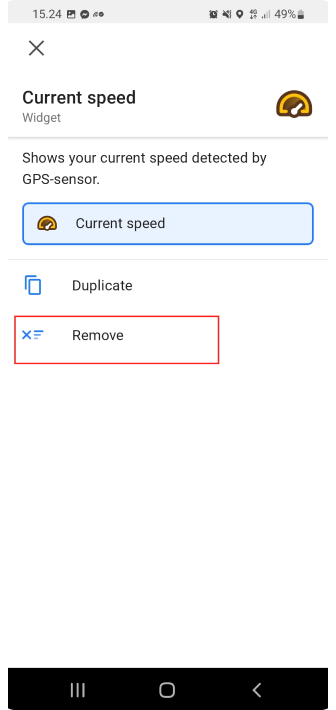
Now we can see that there are several panels where we have different types of widgets. As Current speed was in right panel let's click it. Now we can see all widgets that are set for the right panel. Order can be changed and more can be added by clicking the Edit button at the bottom of the page. If we just want to remove one widget you can press it and then select Remove from the widget information page.
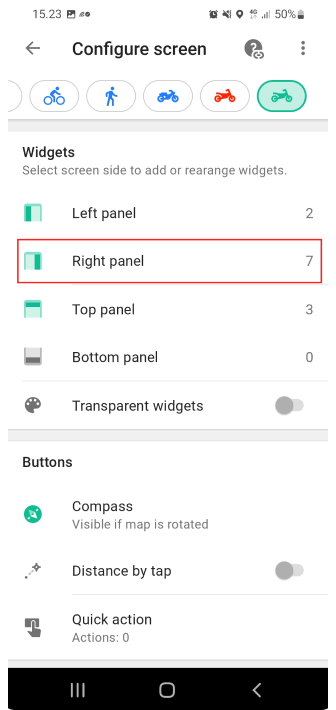 | 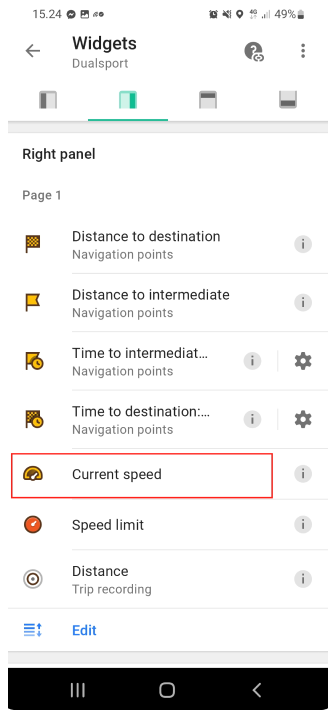 |  |
One thing that I want to Highlight is Compass. I had a problem that the map was not pointing up when I was navigating and I didn’t see the Compass button. Or sometimes I was able to see it and then it got lost and I could not understand what was the issue. So I recommend that the Compass is set always visible so you can easily select how you want your map to behave while navigating.
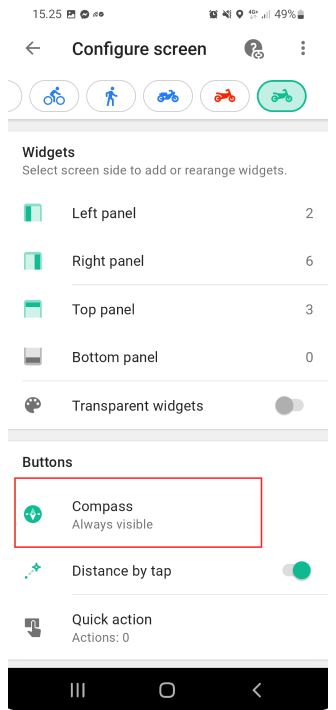 |  |
After changes go back to the map and the Speed widget display has disappeared and if you take another profile it is visible there. So profiles are a pretty powerful tool to use OsmAnd for all kinds of purposes.
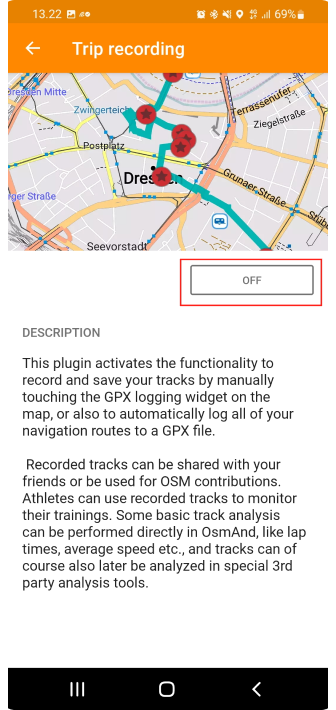
Trip recording
Trip recording in OsmAnd is not activated by default. The feature is available under The Plugins menu.
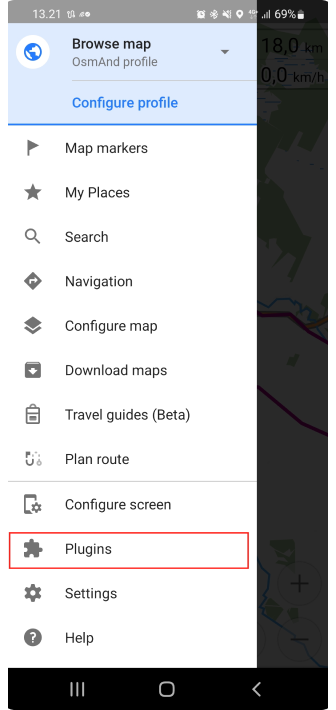 | 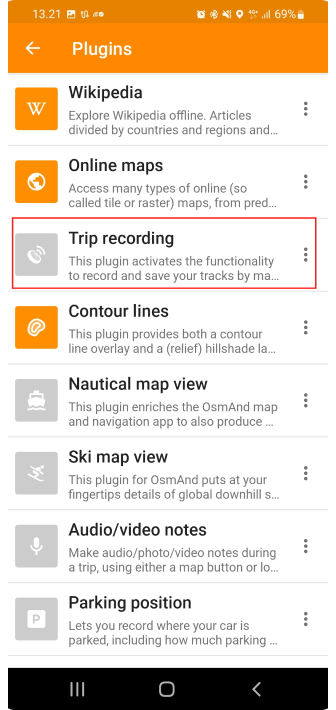 |
 | 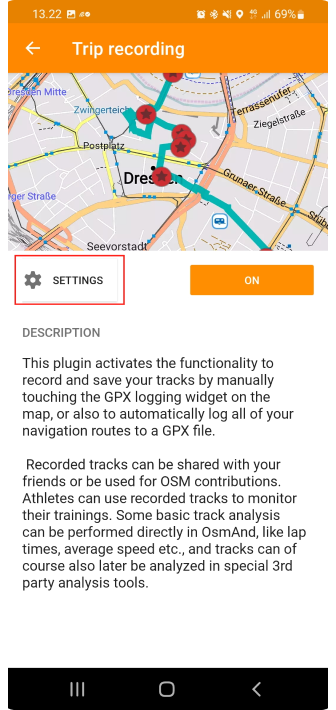 | 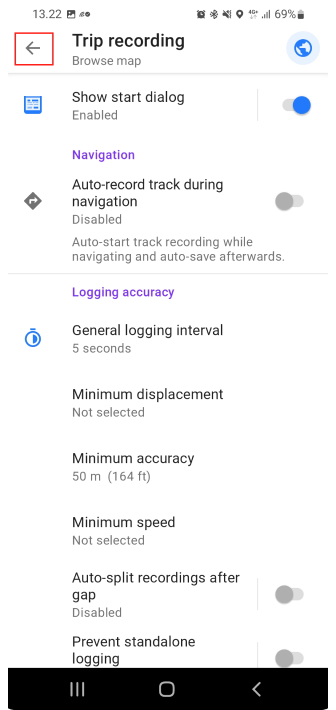 |
Once the Plugin is enabled there is a new item in the Settings menu:
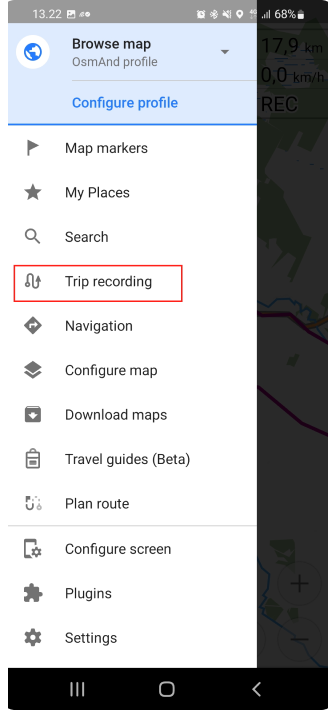 | 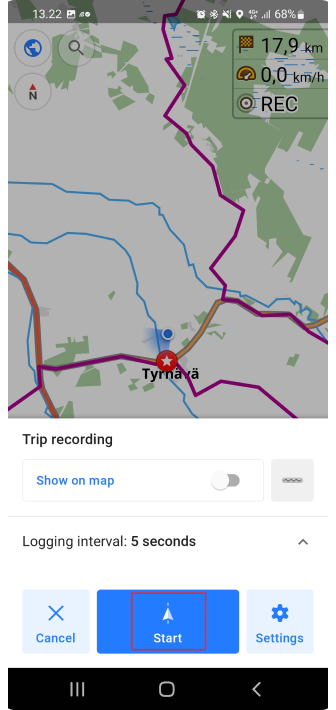 |
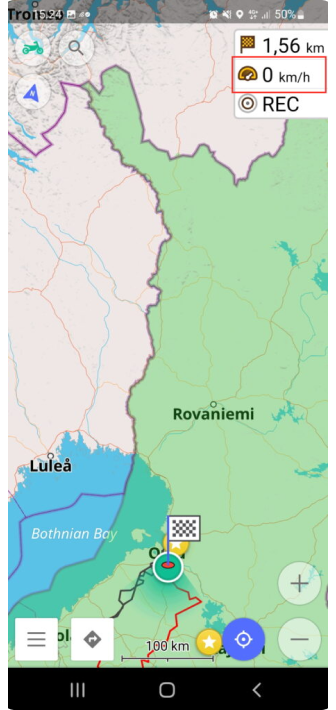
Click the Start button and once you have done recording select Save from the notification bar. You can view the recorded route on the map by selecting Show on the map and opening a track.
 | 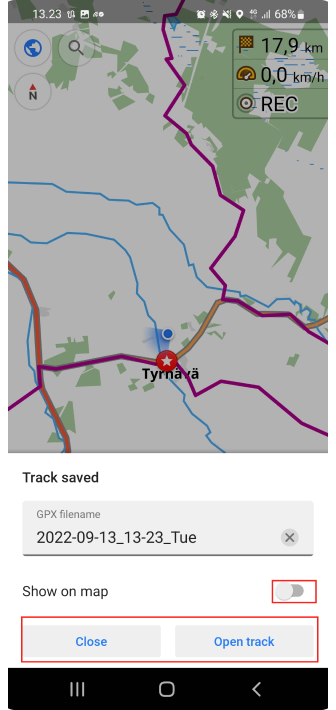 |
Change basemap
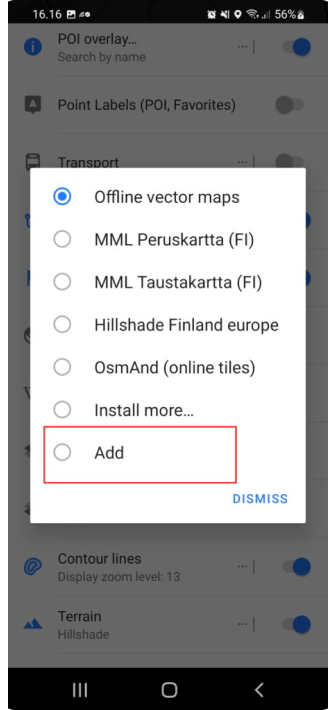
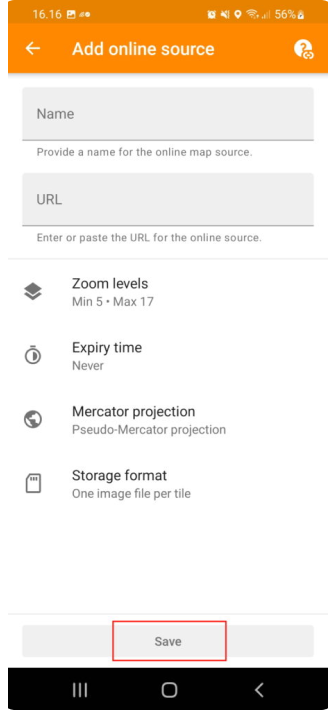
You might prefer another Basemap than the default OsmAnd one. You can change suitable maps from settings. Select Install more to easily install new maps or select Add if you have a specific source for maps.
- You need to activate the Online maps plugin.
- Read more about additional map sources here.
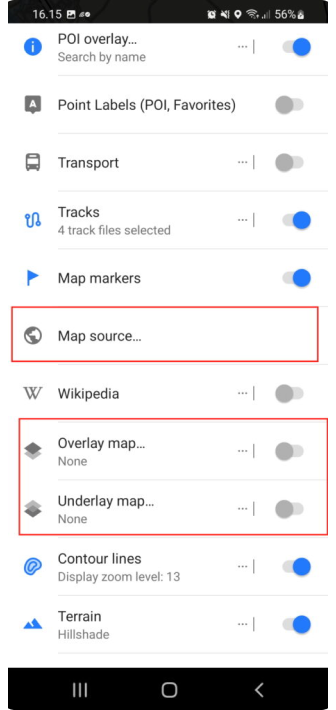 |  |  | 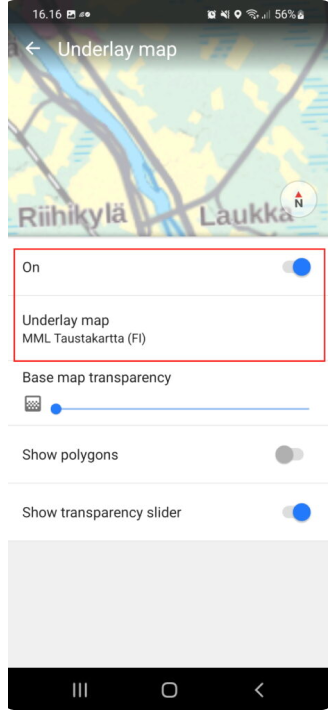 |
It is also possible to set any map as Underlay or Overlay map. This allows you to mix good sides in several maps. I recommend playing with these settings to find exactly the right settings for you. Usually, default is good enough.
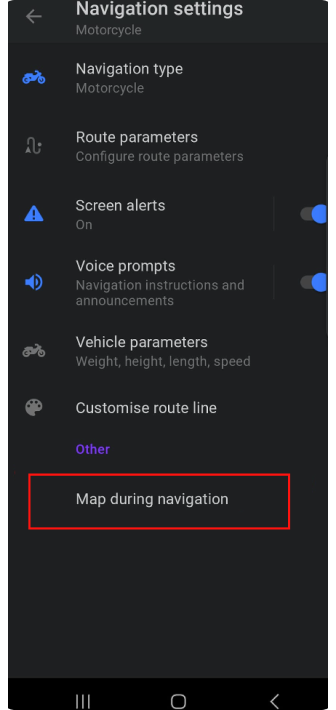
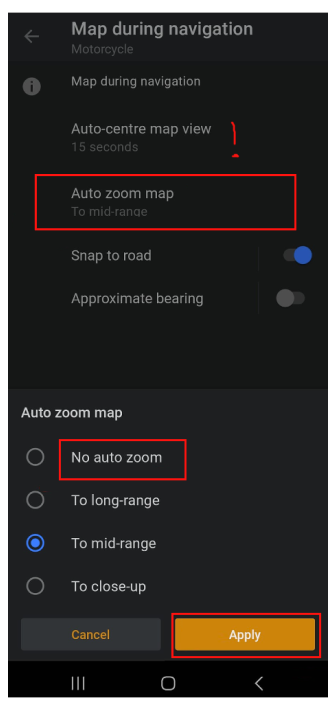
Removing automatic centering
Automatic centering is good to have, but once I purchased Silverfox bluetooth controller I disabled this feature. While I use a controller I don’t want the screen to center itself when I look at possible routes ahead. I was using a default timer that was 15 sec for automatic centering. That can be changed from the same place if you don’t want to disable the whole feature.
So how to do it? Click the menu open and follow the screenshot guidance, notice that this is a profile-based setting so you can enable it for driving mode and disable it from Motorbike profiles.
 |  |  |
 |  |  |
How soon application should reroute
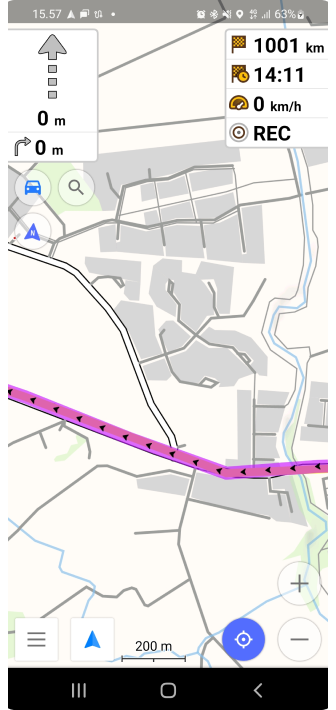
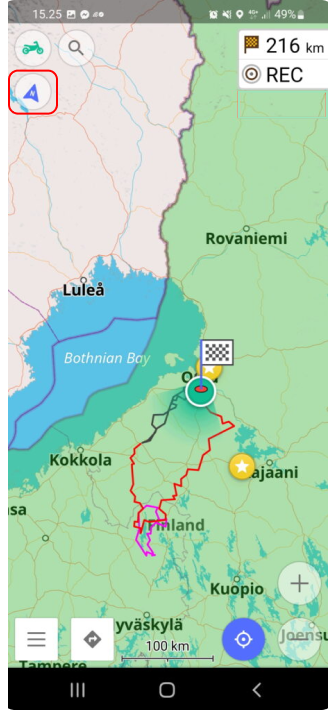
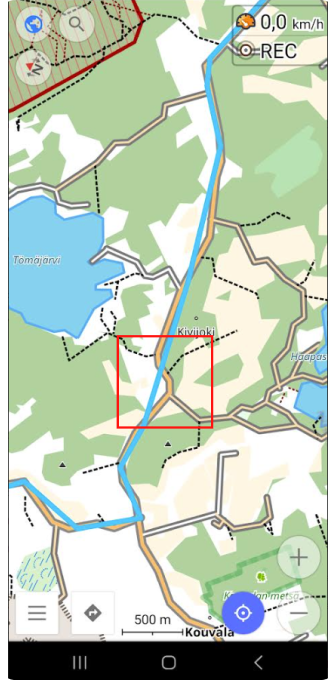
Many might have noticed that if you follow TET route it is not following roads as it is just a track that should be followed without road navigation. Anyway, I like to see where to turn next so I use navigation in TET tracks. Sometimes OsmAnd wants to start recalculating the route if the actual Line goes too far away from a road that you should ride.
Here we have one example inside of the red box When you follow the road, but the line that you navigate goes away from the road OsmAnd might want to recalculate a new route to get back to where you dropped from the line. This causes quite unneeded updates in UI and if you have navigation commands on to helmet headset you might also get recalculated audio information.
So to avoid this it is good to add more flex when OsmAnd is thinking that you are in the wrong place.
 |
You can modify route recalculation settings under Profile. Once again it is a profile that specifies how OsmAnd works. So you can have different settings when you go with a car and different when motorbiking. I have used 500m to trigger a recalculation, but you can check what works for you. It is also possible to disable the whole recalculation from the same place, but I like to keep it on.
 |  |  |
 | 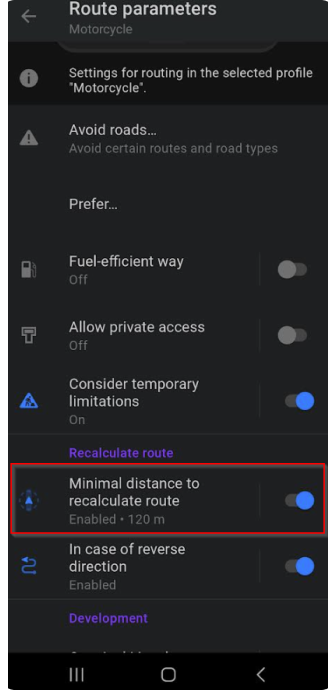 | 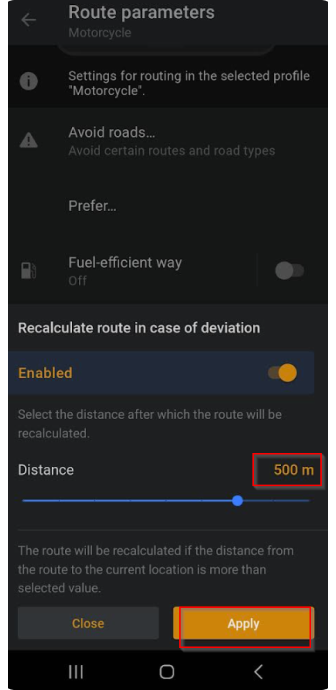 |
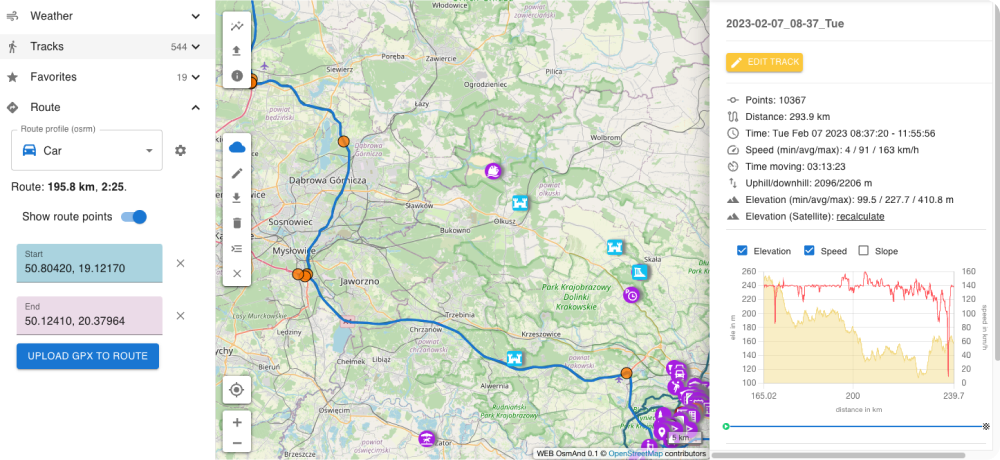
Web Planner
OsmAnd has also launched a web planner that can be found at www.osmand.net/map to get all out of it, Pro subscription is needed, but Basic is works with a free account too. This is still quite simple, but hopefully, we see progress on this planner and the same filter (prefer gravel roads) to the web that we have on the mobile side.
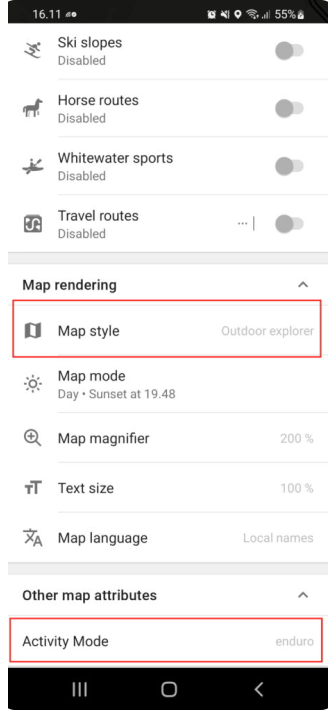
Custom map type
Outdoor explorer Plugin allows you to see road surface. Information is taken from openstreetmap so also contribution to it is pretty easy.
You can find this plugin and setup guide here.
I noticed an issue when I was trying to use Samsung own “My files” application to open plugin file, but when I installed total commander installation was OK.
Find more Custom map types in the OsmAnd blog article.
 |  |
You can read and see my materials here: Website, Facebook, Instagram, Youtube channel.
We appreciate your interest in us and thank you for taking the time to read this article. Join us on social media to keep up to date with the latest news and share your experiences. Your opinion is important to us.
Follow OsmAnd on Facebook, TikTok, X (Twitter), Reddit, and Instagram!
Join us at our groups of Telegram (OsmAnd News channel), (EN), (IT), (FR), (DE), (UA), (ES), (BR-PT), (PL), (AR), (TR).

