Terrain maps

Hello everybody!
In the OsmAnd 4.5 release, a new terrain map type has been added. This is a new data type in our application, which is needed for terrain rendering, and for some additional functions related to elevations. All the information is in our documentation, but in this article, we will describe how and what you can see and get on the screen with a new data type.
☛ Let's go!
Let us introduce you to a useful and informative solution for working with these data types.
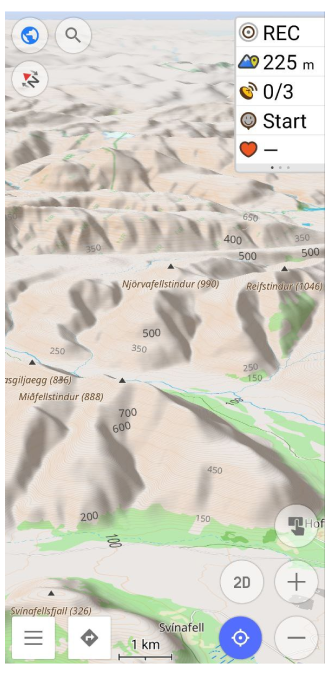
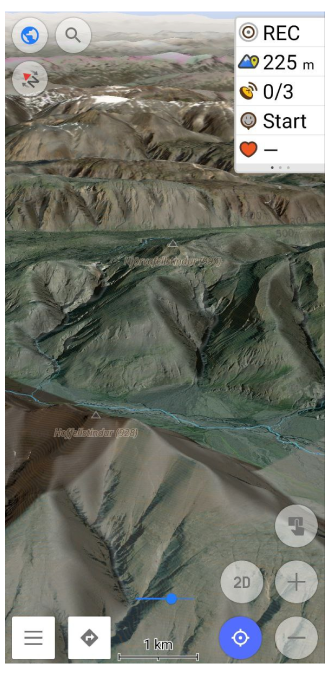
First, take a look at these screenshots:
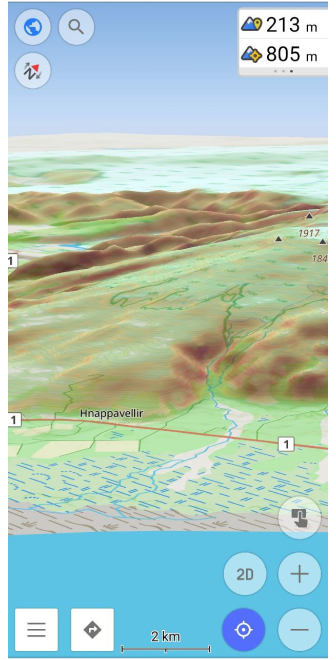 | 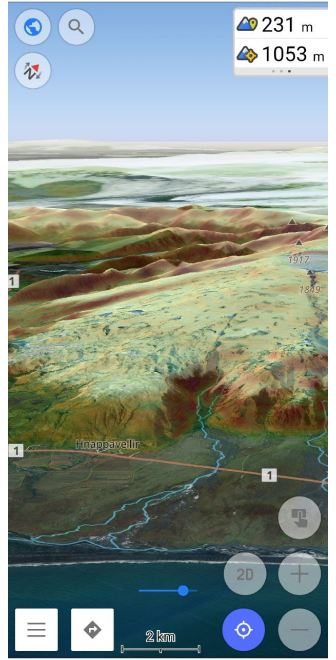 |
On them, you can see 3D relief and slopes using vector and raster maps. The widget shows Elevation in the center of the screen.
This is an example of the possibilities of terrain data, and that's not everything.
Benefits:
- 🌟 Compact file size. Does not require a lot of space on your device.
- 🌄 Variety of data displays. OsmAnd allows you to choose several display options. Imagine the realism of data display as if you were exploring different worlds - from spectacular hills to steep slopes and exciting 3D relief.
- 🔌 Autonomous use. This is one of the important features. No dependence on internet connection, no restrictions wherever you are.
Terrain map data
The Terrain map data is a paid function, to get it you need:
- Purchase one of the OsmAnd paid packages available
- Hillshades/Slopes for OsmAnd+, OsmAnd Maps+.
- 3D Relief and "Elevation: map center" widget with OsmAnd Pro subscription.
Download Terrain map data from Menu → Download maps → Regions → Selected country → Terrain map (3D).
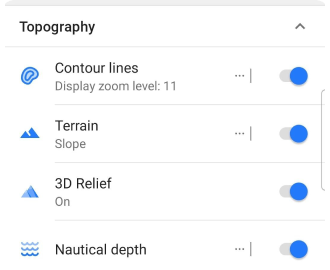
Topography menu
After downloading the Terrain map data, the next step is to activate Terrain and 3D Relief for your map.
Go to: Menu → Configure map → Topography
Terrain
The Terrain menu includes and customizes two parameters: Hillshade and Slope. This is how they look on the map:
| Hillshade | Slope |
|---|---|
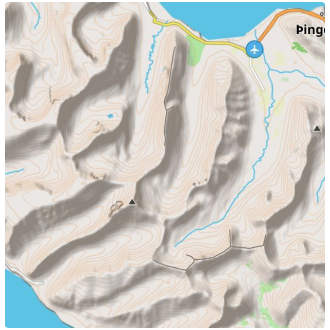 | 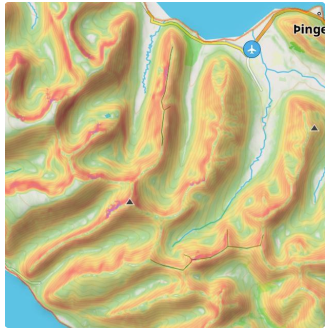 |
How to select a color scheme and other parameters for layers? Select a terrain parameter in Menu → Configure map → Topography → Terrain → Colour scheme and then Hillshade or Slope.
-
Hillshade
Hillshade is a visualization technique that gives terrain maps and elevation images amazing depth and dimension. This method is used to create impressive and realistic views of the earth's surface, allowing you to look at the landscape from a new and exciting perspective.The idea of Hillshade is to simulate lighting on a relief surface. By determining the direction and intensity of the light source on the map, Hillshade creates a shadowing and highlighting effect on the terrain. This allows you to see rising hills, descending valleys, and other landscape features as if they were illuminated by the sun.
By using the Hillshade technique, maps become clearer and more visual. This is especially useful when analyzing topographic data and planning routes. Hillshade gives maps a realistic look and provides a deeper understanding of the world around you.
-
Slope Slope is a key parameter that defines the angle of inclination of a land surface or other surface relative to the horizontal. It is expressed in degrees and is an important tool for terrain analysis and landscape slope assessment.
The larger the slope value, the steeper the angle of elevation of the surface. Slope determines how quickly elevation changes over a given horizontal distance. A large slope may indicate steeper areas of the landscape, while a small slope may indicate a more gentle or flat landscape.
With Slope, you can identify unique terrain features by determining where the slopes are steepest and where the surface is smoother. Look at your map from a new perspective by visualizing slopes and gain a deeper understanding of the landscape. Adjust color transparency to make your analysis more visual, and control the zoom level to see details at the right scale.
| Colour scheme - Hillshade | Colour scheme - Slope |
|---|---|
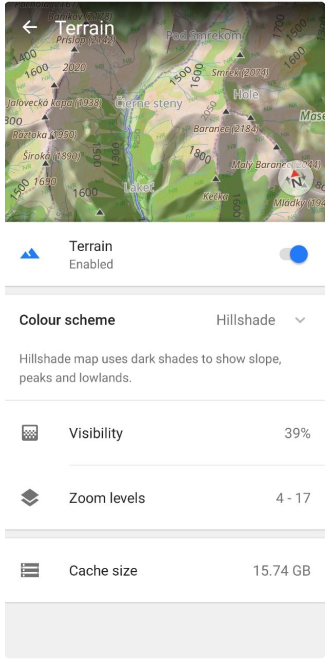 | 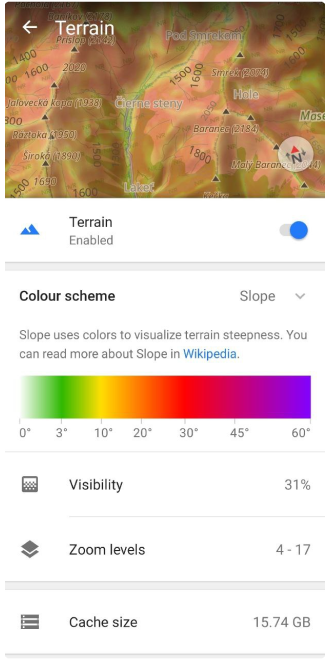 |
Visibility is the transparency parameter of the colors used to display the angle (Slope) and the shading (Hillshade).
| Visibility 31% | Visibility 74% |
|---|---|
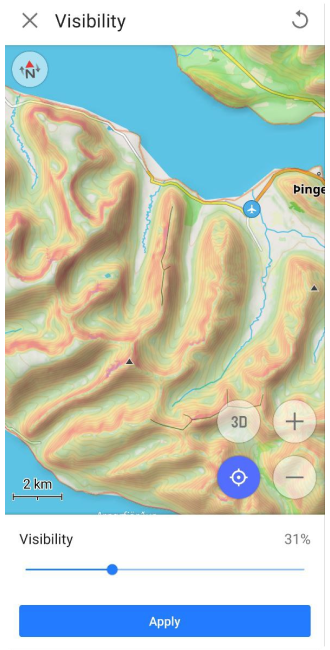 | 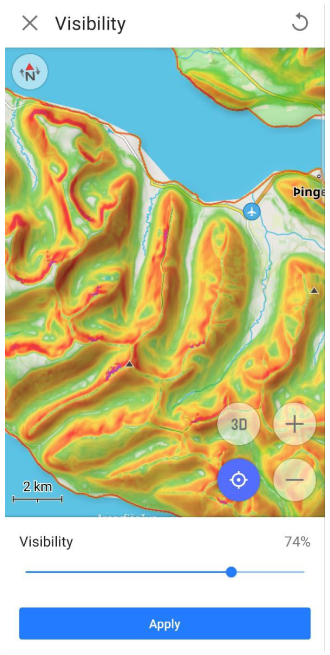 |
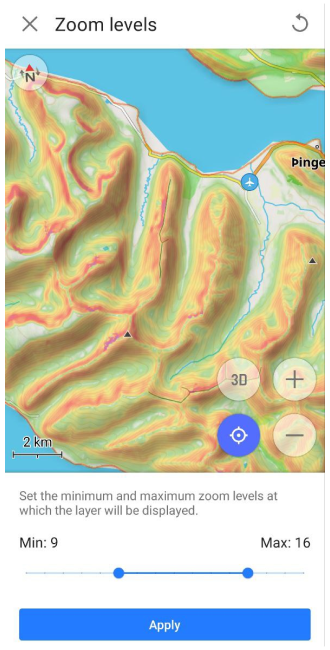
Zoom levels is an option that allows you to set the minimum and maximum zoom levels at which the layer will be displayed.
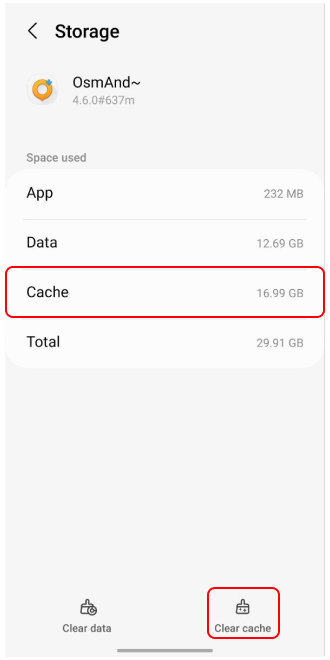
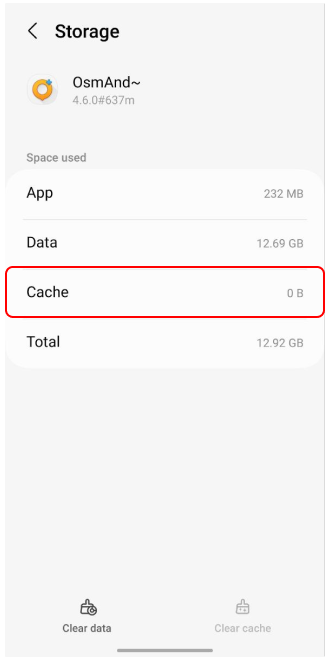
Cache size is a parameter that shows the size of the cache. Each time you view terrain information on the map (Hillshade or Slope), all this data is cached for quick use in the future (no additional load on the device's processor).
To clear the cache, go here: System settings → Apps → OsmAnd → Storage → Clear cache
| Before | After |
|---|---|
 |  |
3D relief
3D Relief feature (only for OsmAnd Pro) creates a raised relief and provides a three-dimensional representation of the landscape. 3D Relief works offline and can be used with OsmAnd vector maps or any raster maps as a Map Source or Underlay/Overlay.
To enable 3D Relief, go to: Menu → Configure map → Topography → 3D Relief and toggle on.
3D terrain (offline) can now be seen on a map with any map layers:
| Vector map layer | Raster map layer |
|---|---|
 |  |
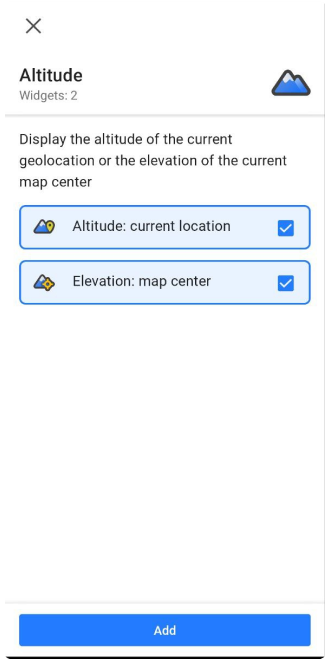
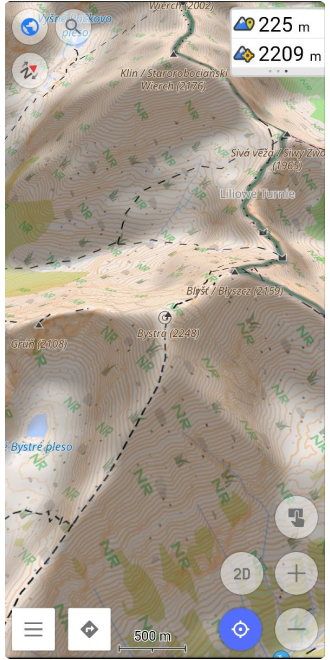
Elevation Widget
With Terrain map data you can view the altitude for each point on the map.
To display Elevation: map center widget, add it on the device screen:
Menu → Configure screen → Left / Right panel → Altitude.
| Widget settings screen | Widgets on the screen |
|---|---|
 |  |
Calculation elevation
The next function (only for OsmAnd Pro), Calculation elevation, allows you to offline calculate terrain elevation from Terrain map data for any GPX tracks that do not contain elevation data for any points on the map:
Track Context menu → Track → Altitude → Calculate elevation → Calculate offline.
| Before | After |
|---|---|
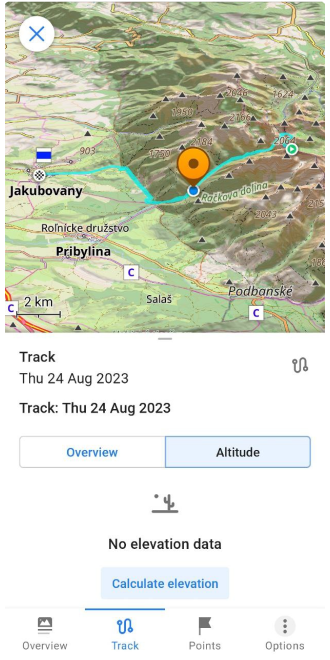 | 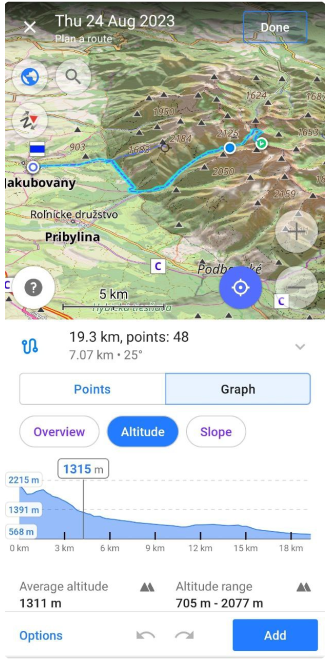 |
We appreciate your interest in us and thank you for taking the time to read this article. Join us on social media to keep up to date with the latest news and share your experiences. Your opinion is important to us.
Follow OsmAnd on Facebook, TikTok, X (Twitter), Reddit, and Instagram!
Join us at our groups of Telegram (OsmAnd News channel), (EN), (IT), (FR), (DE), (UA), (ES), (BR-PT), (PL), (AR), (TR).

